Smart Dine Admin Training Guide
A simple guide to set up, manage daily operations, and support your guests
Account Creation (One-Time)
Get started with your Smart Dine account
Get Started
- Click the Get Started button.

- You will see the Pricing Page.
- Review the available pricing plans and choose the one that suits your business.
- Click Get Started / Subscribe to continue.
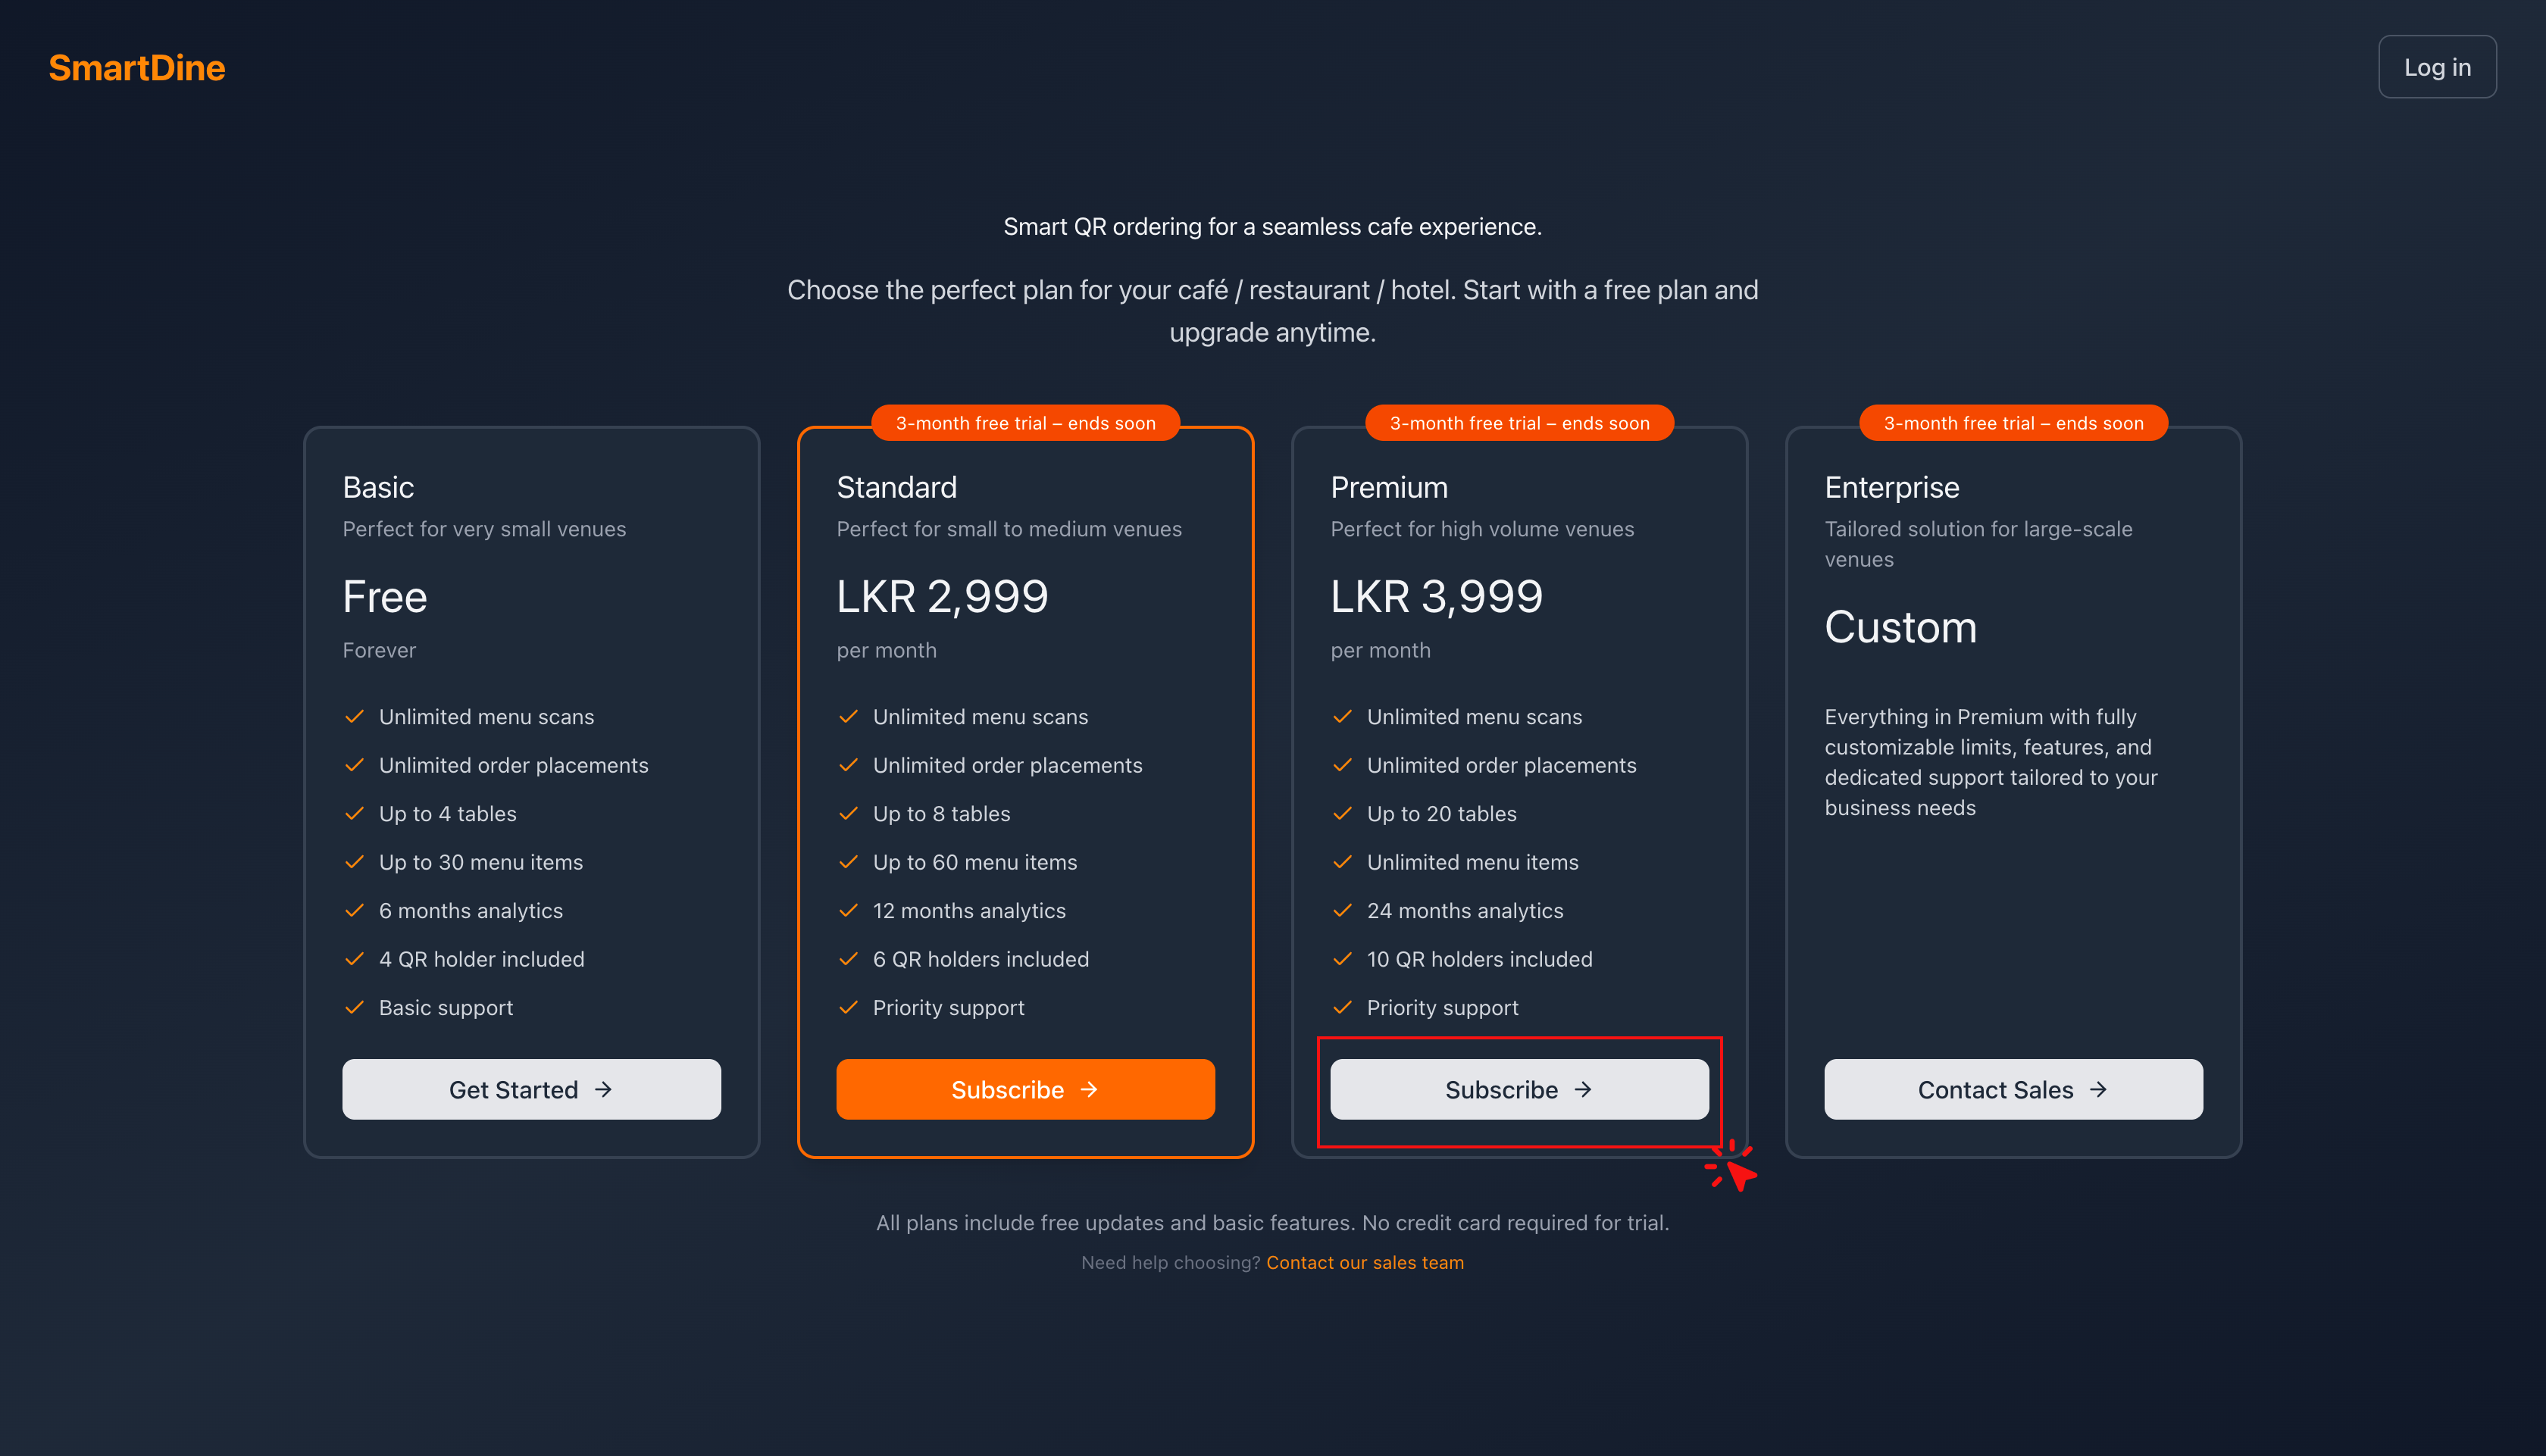
Tip: Refer to the Pricing PDF for more details.
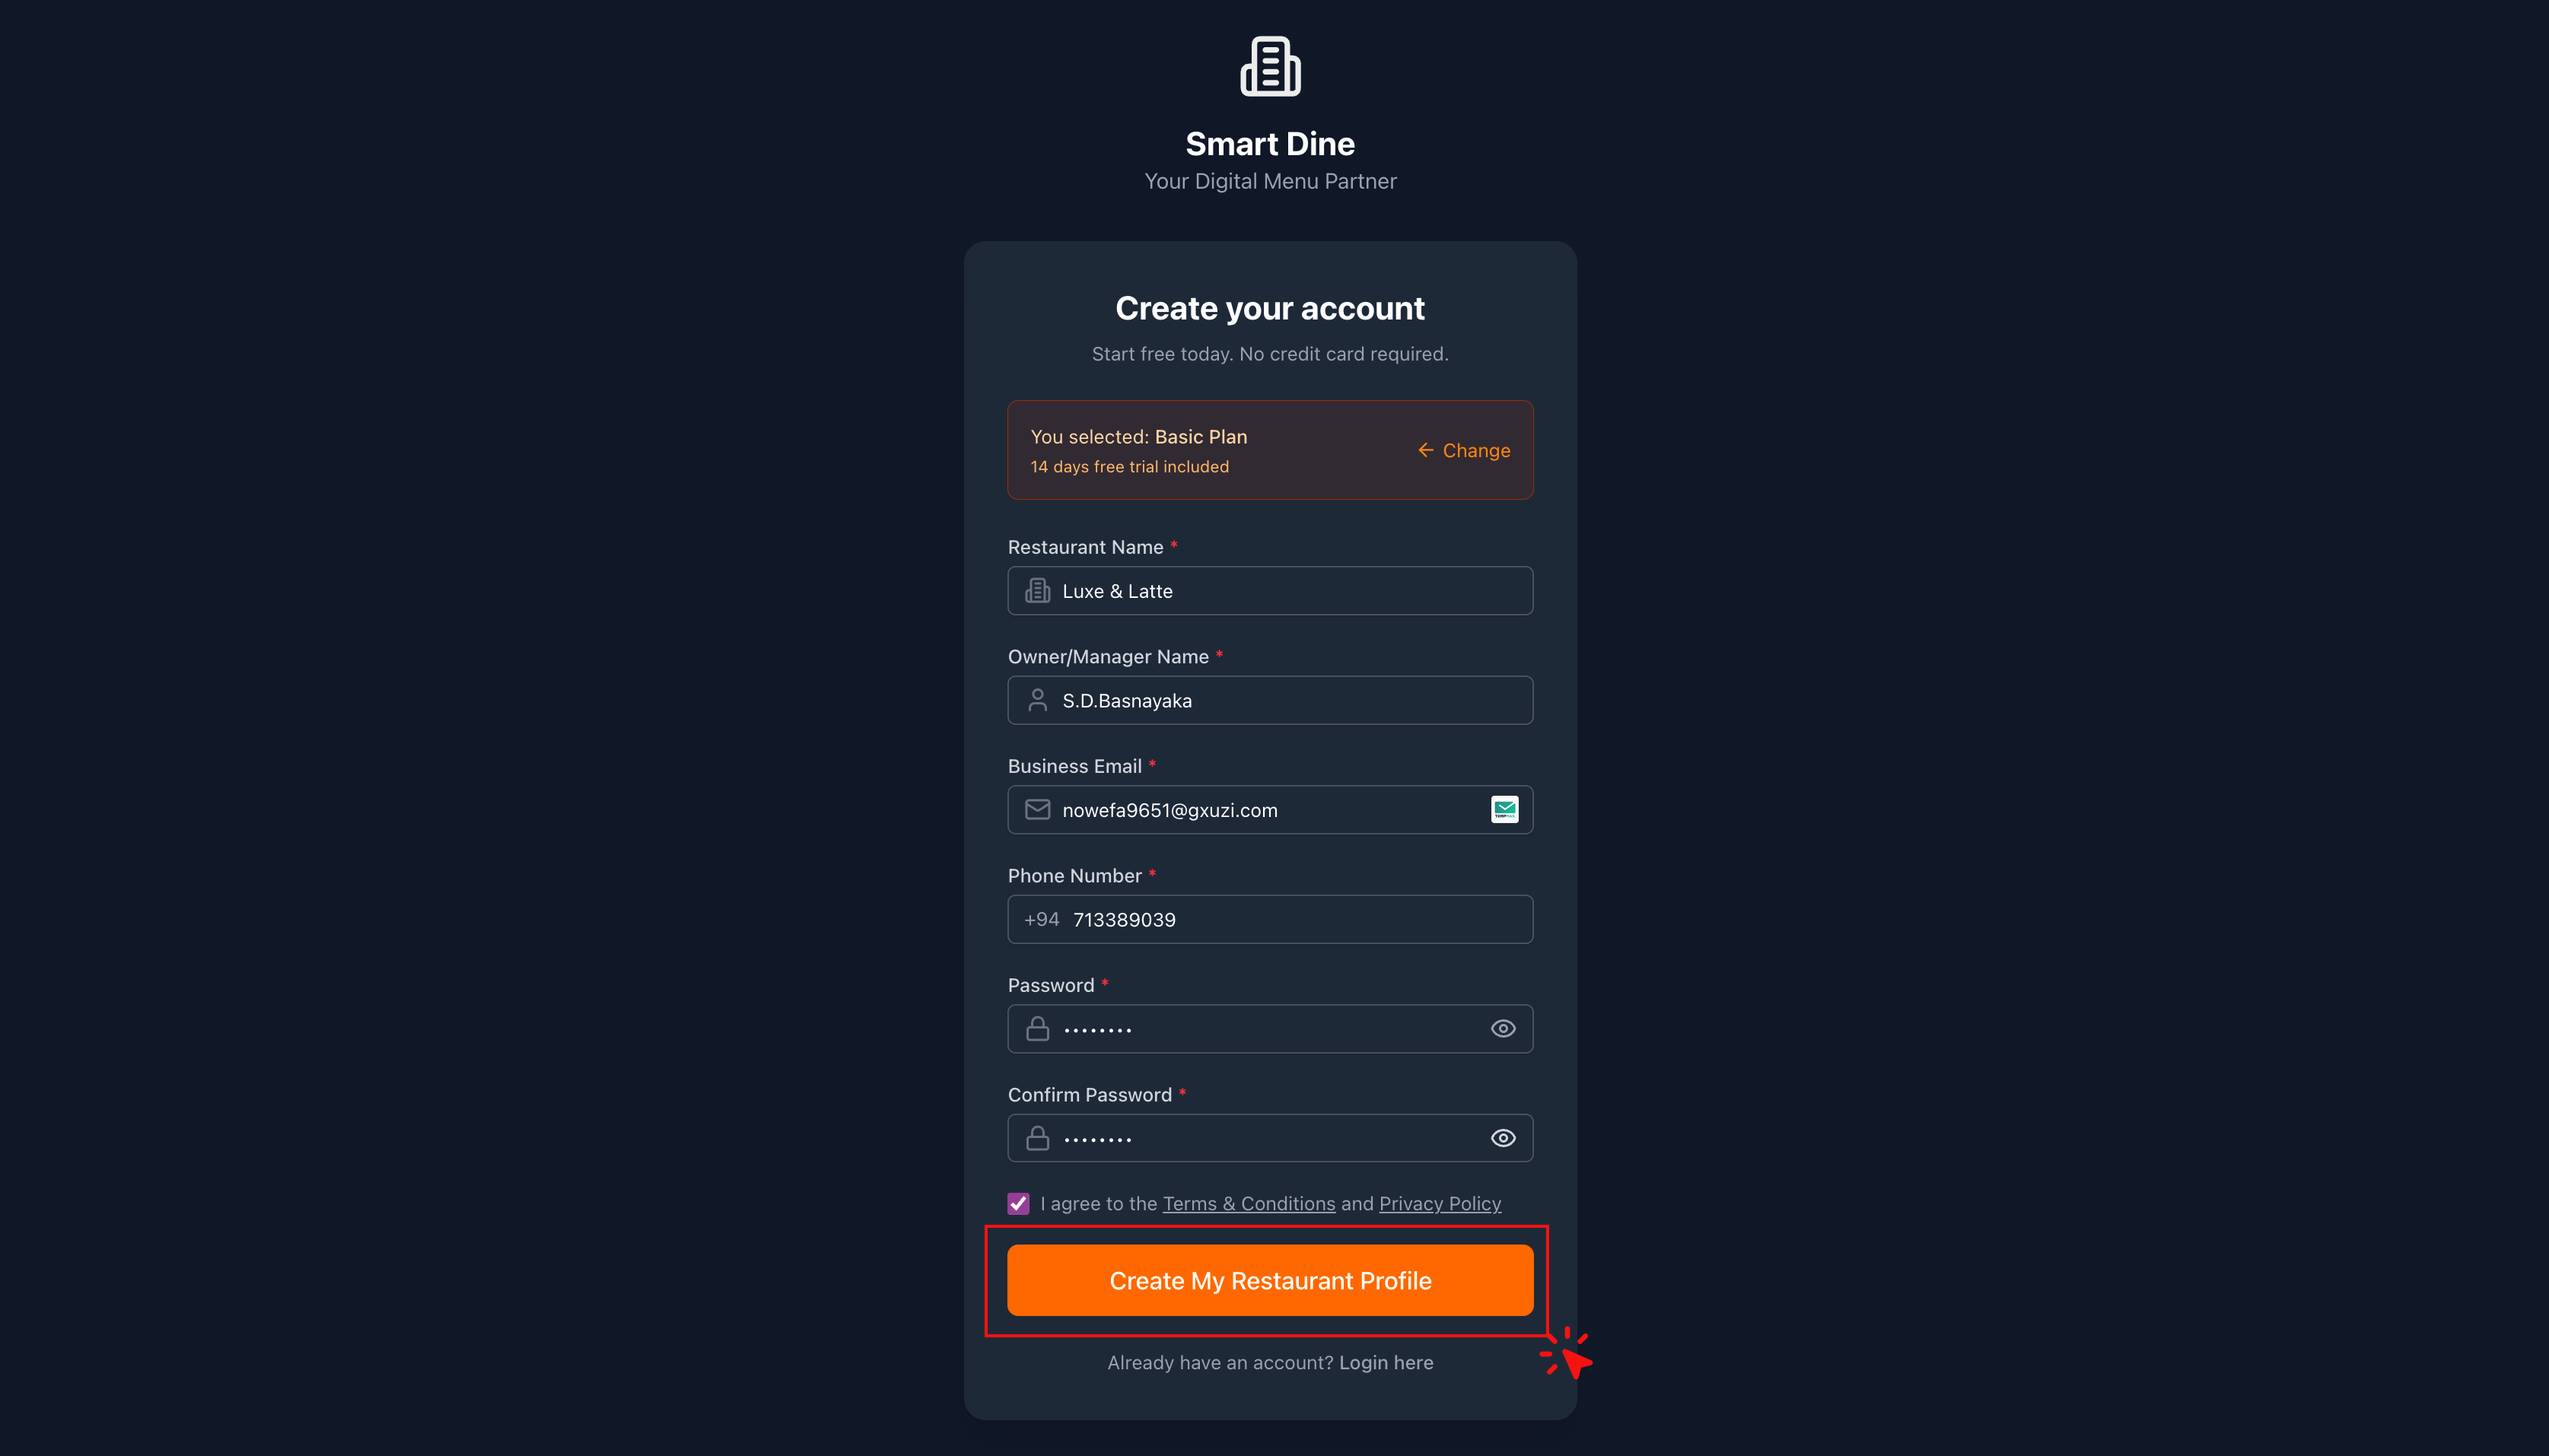
Create Your Restaurant Profile
- Enter your hotel / café / restaurant name and the required details.
- Click Create My Restaurant Profile.
Verify Your Email
- Check your email inbox for a verification email.
- Click the verification link or enter the verification code.
- You will see a message confirming Email Verified.
Log In
- Go back to the Login Page.
- Enter your email and the password you created.
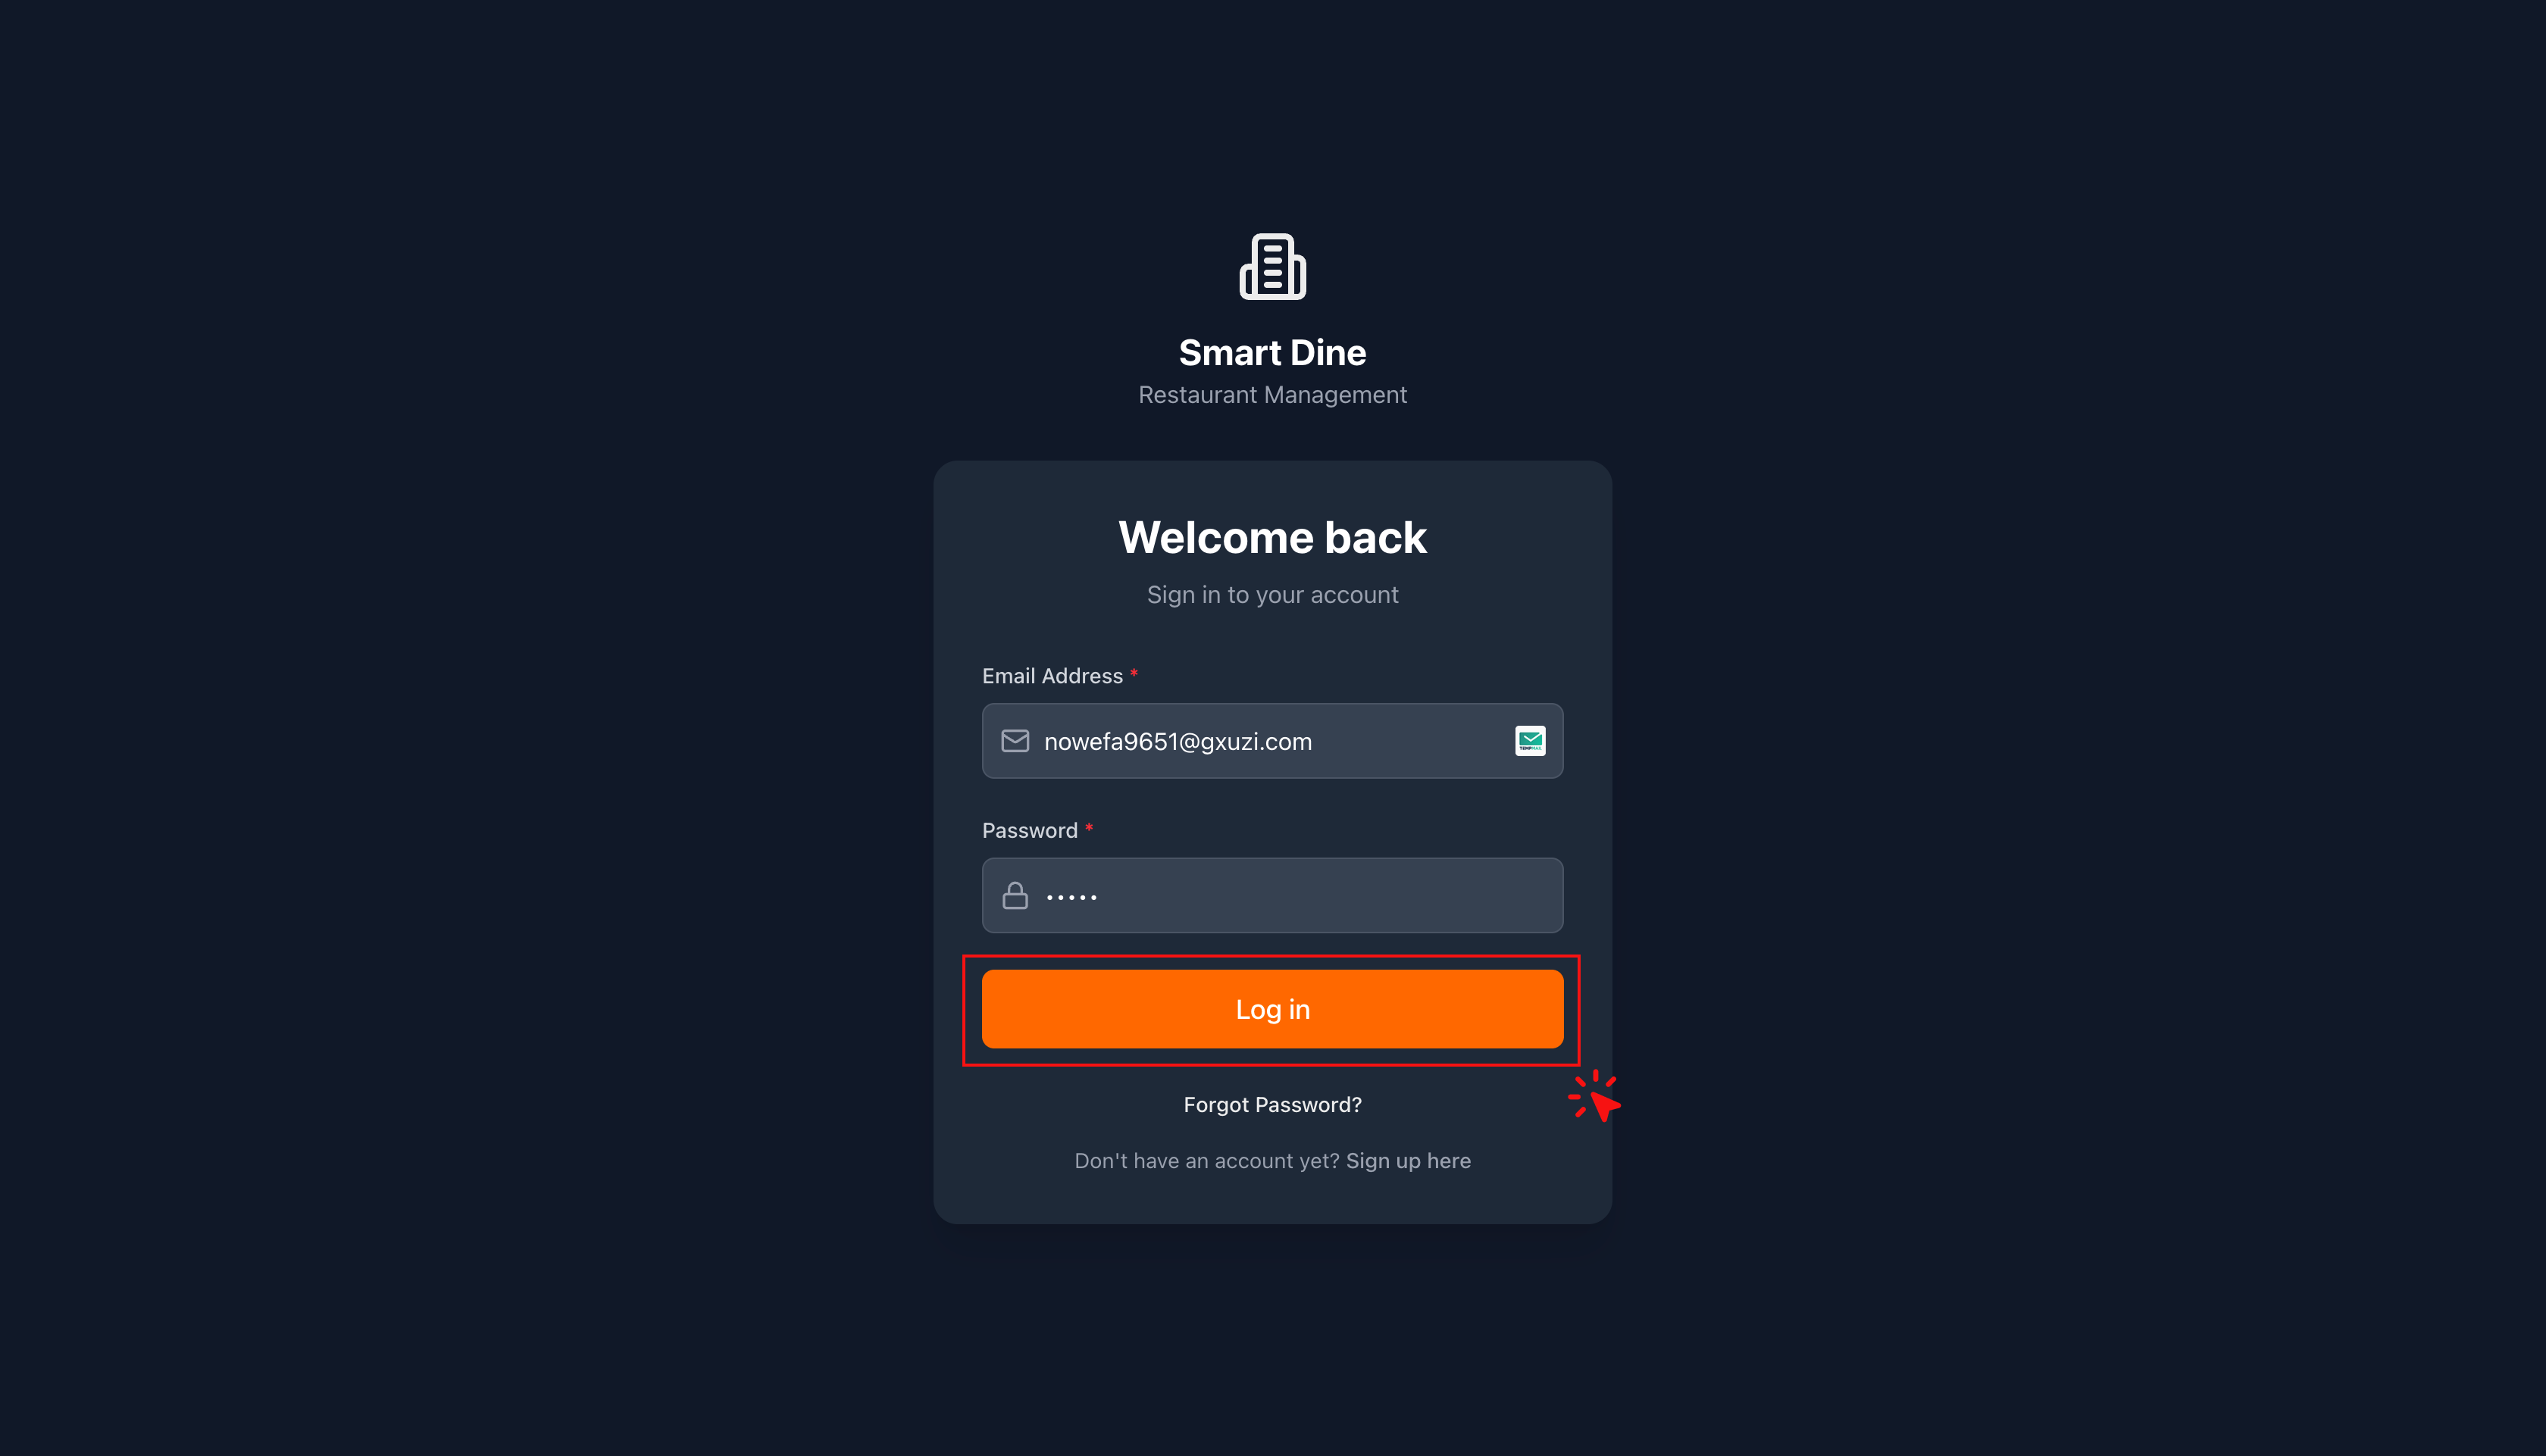
🎉 You're all set and ready to use SmartDine!
Account Setup (One-Time)
Configure your restaurant for the first time
After account creation, the next step is setting up your café or restaurant.
You will see an Onboarding Checklist to guide you. On the left side, you'll find the main navigation menu.
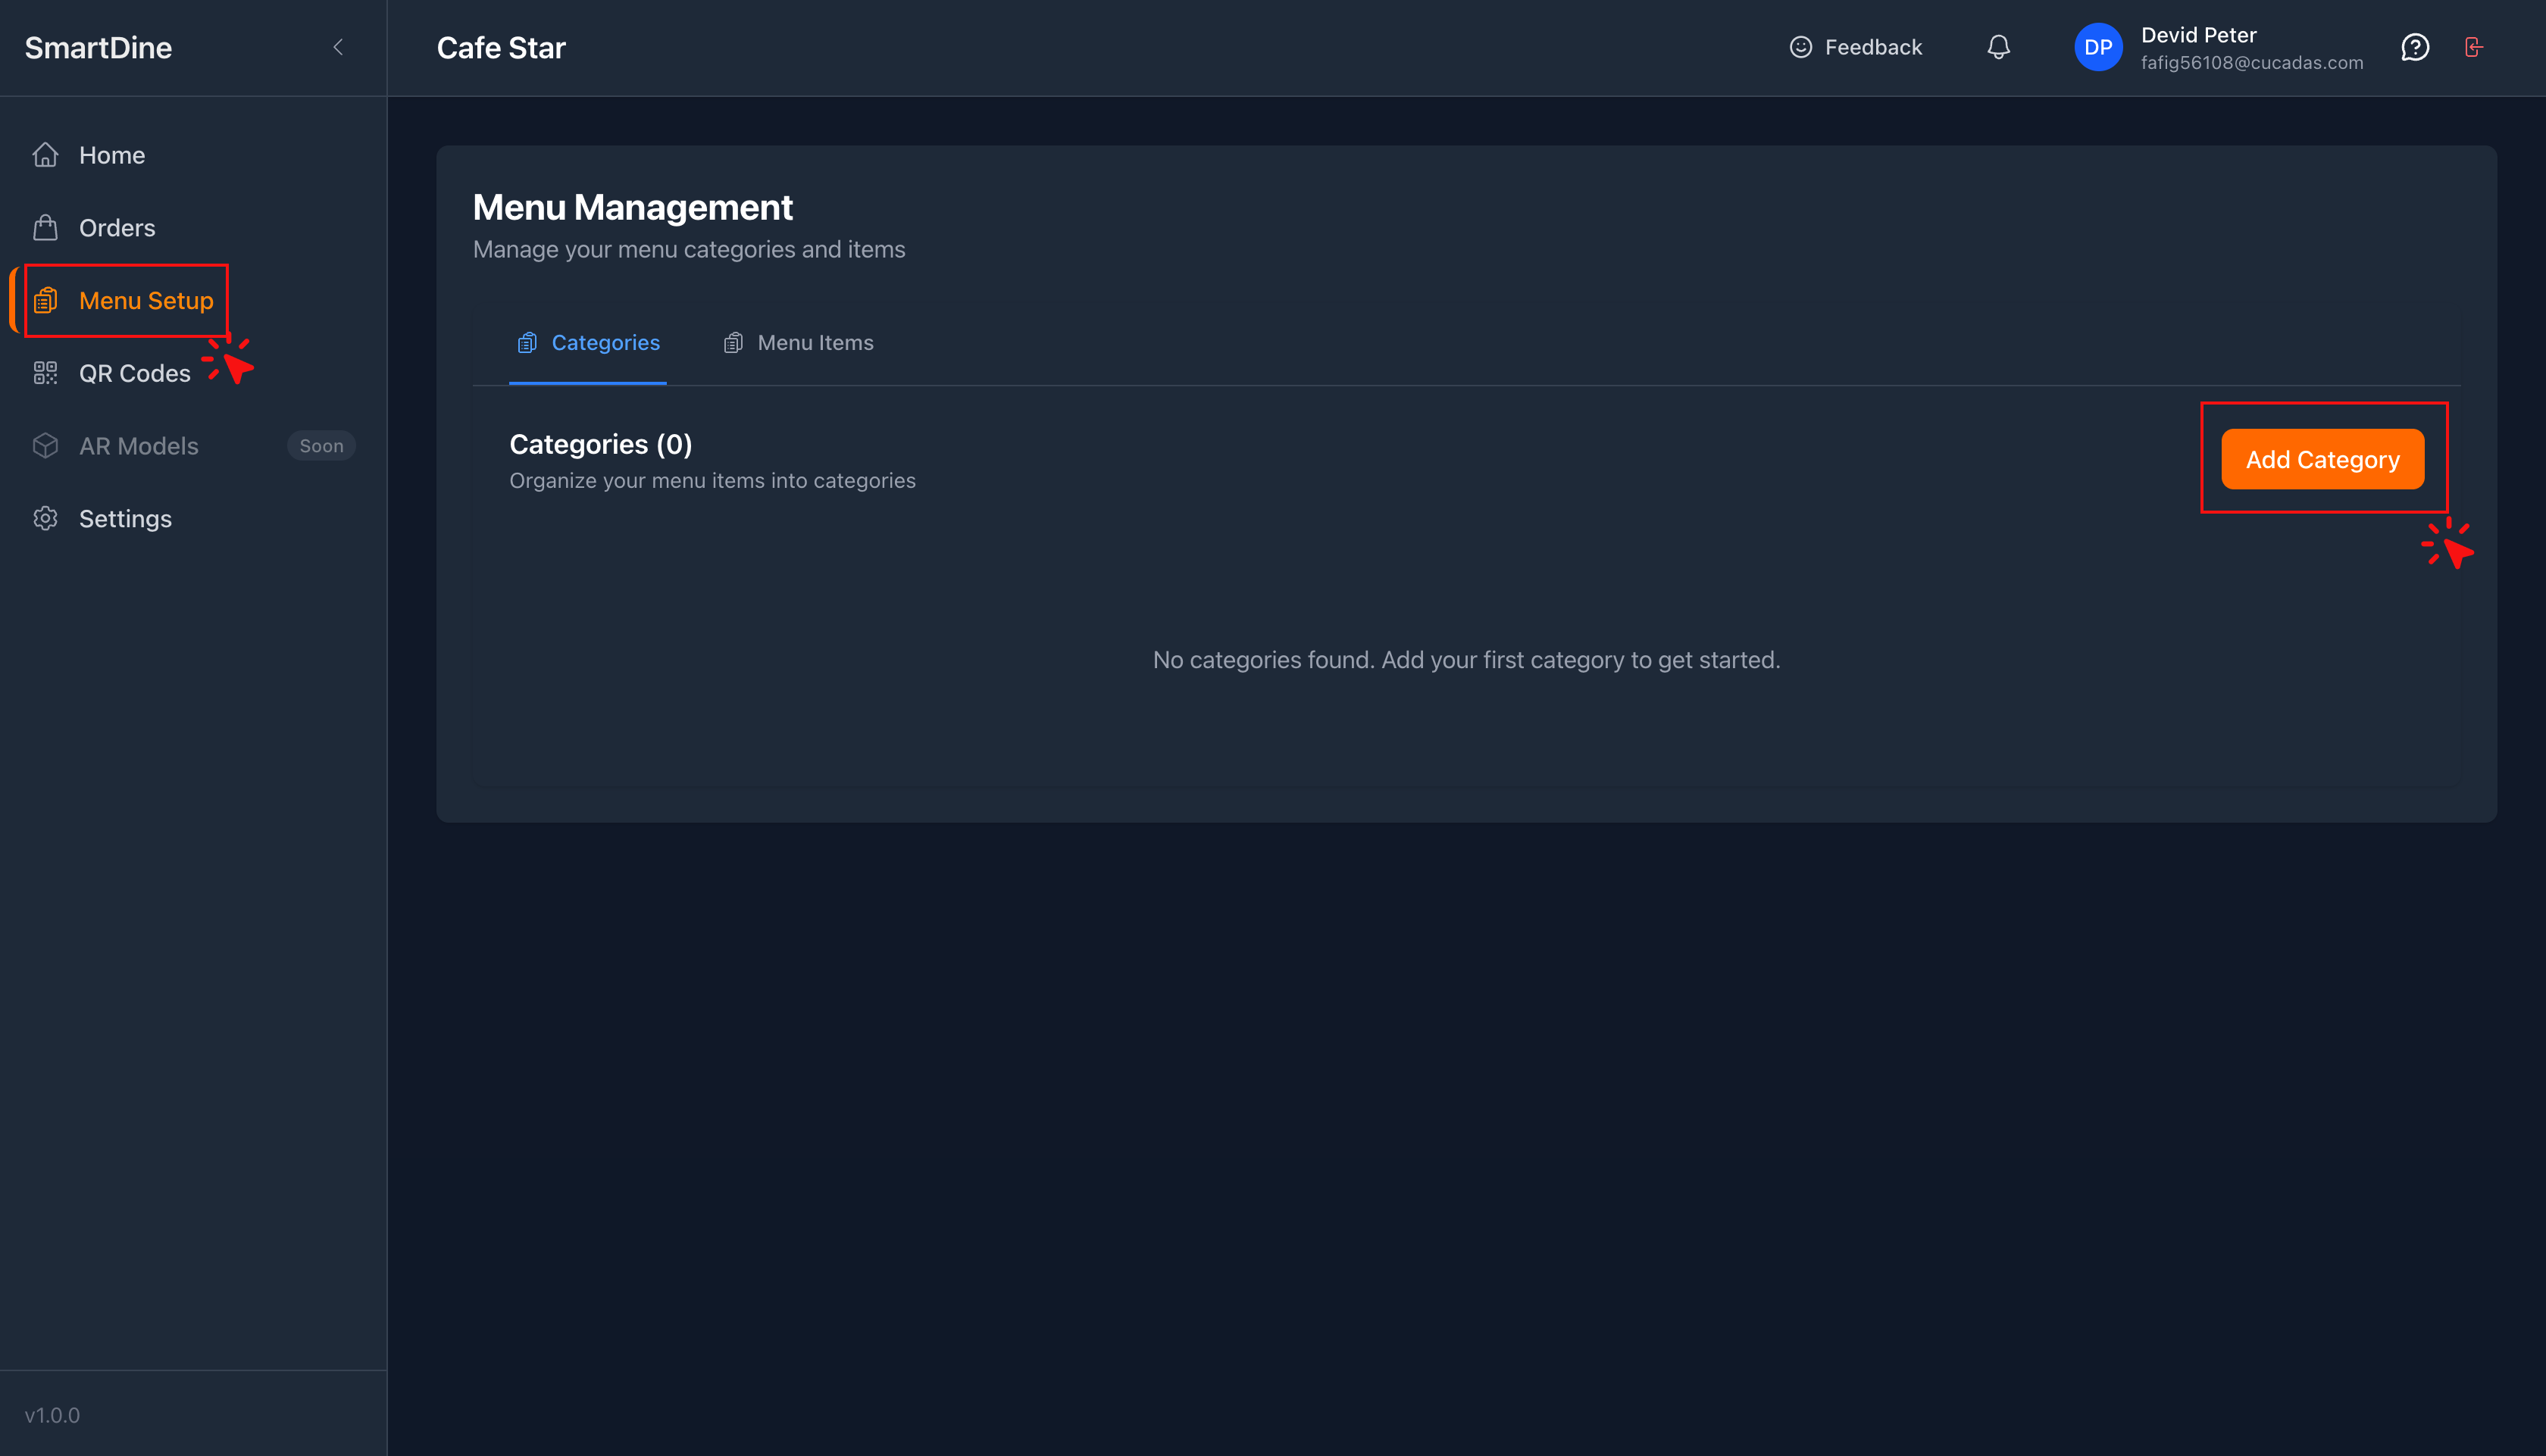
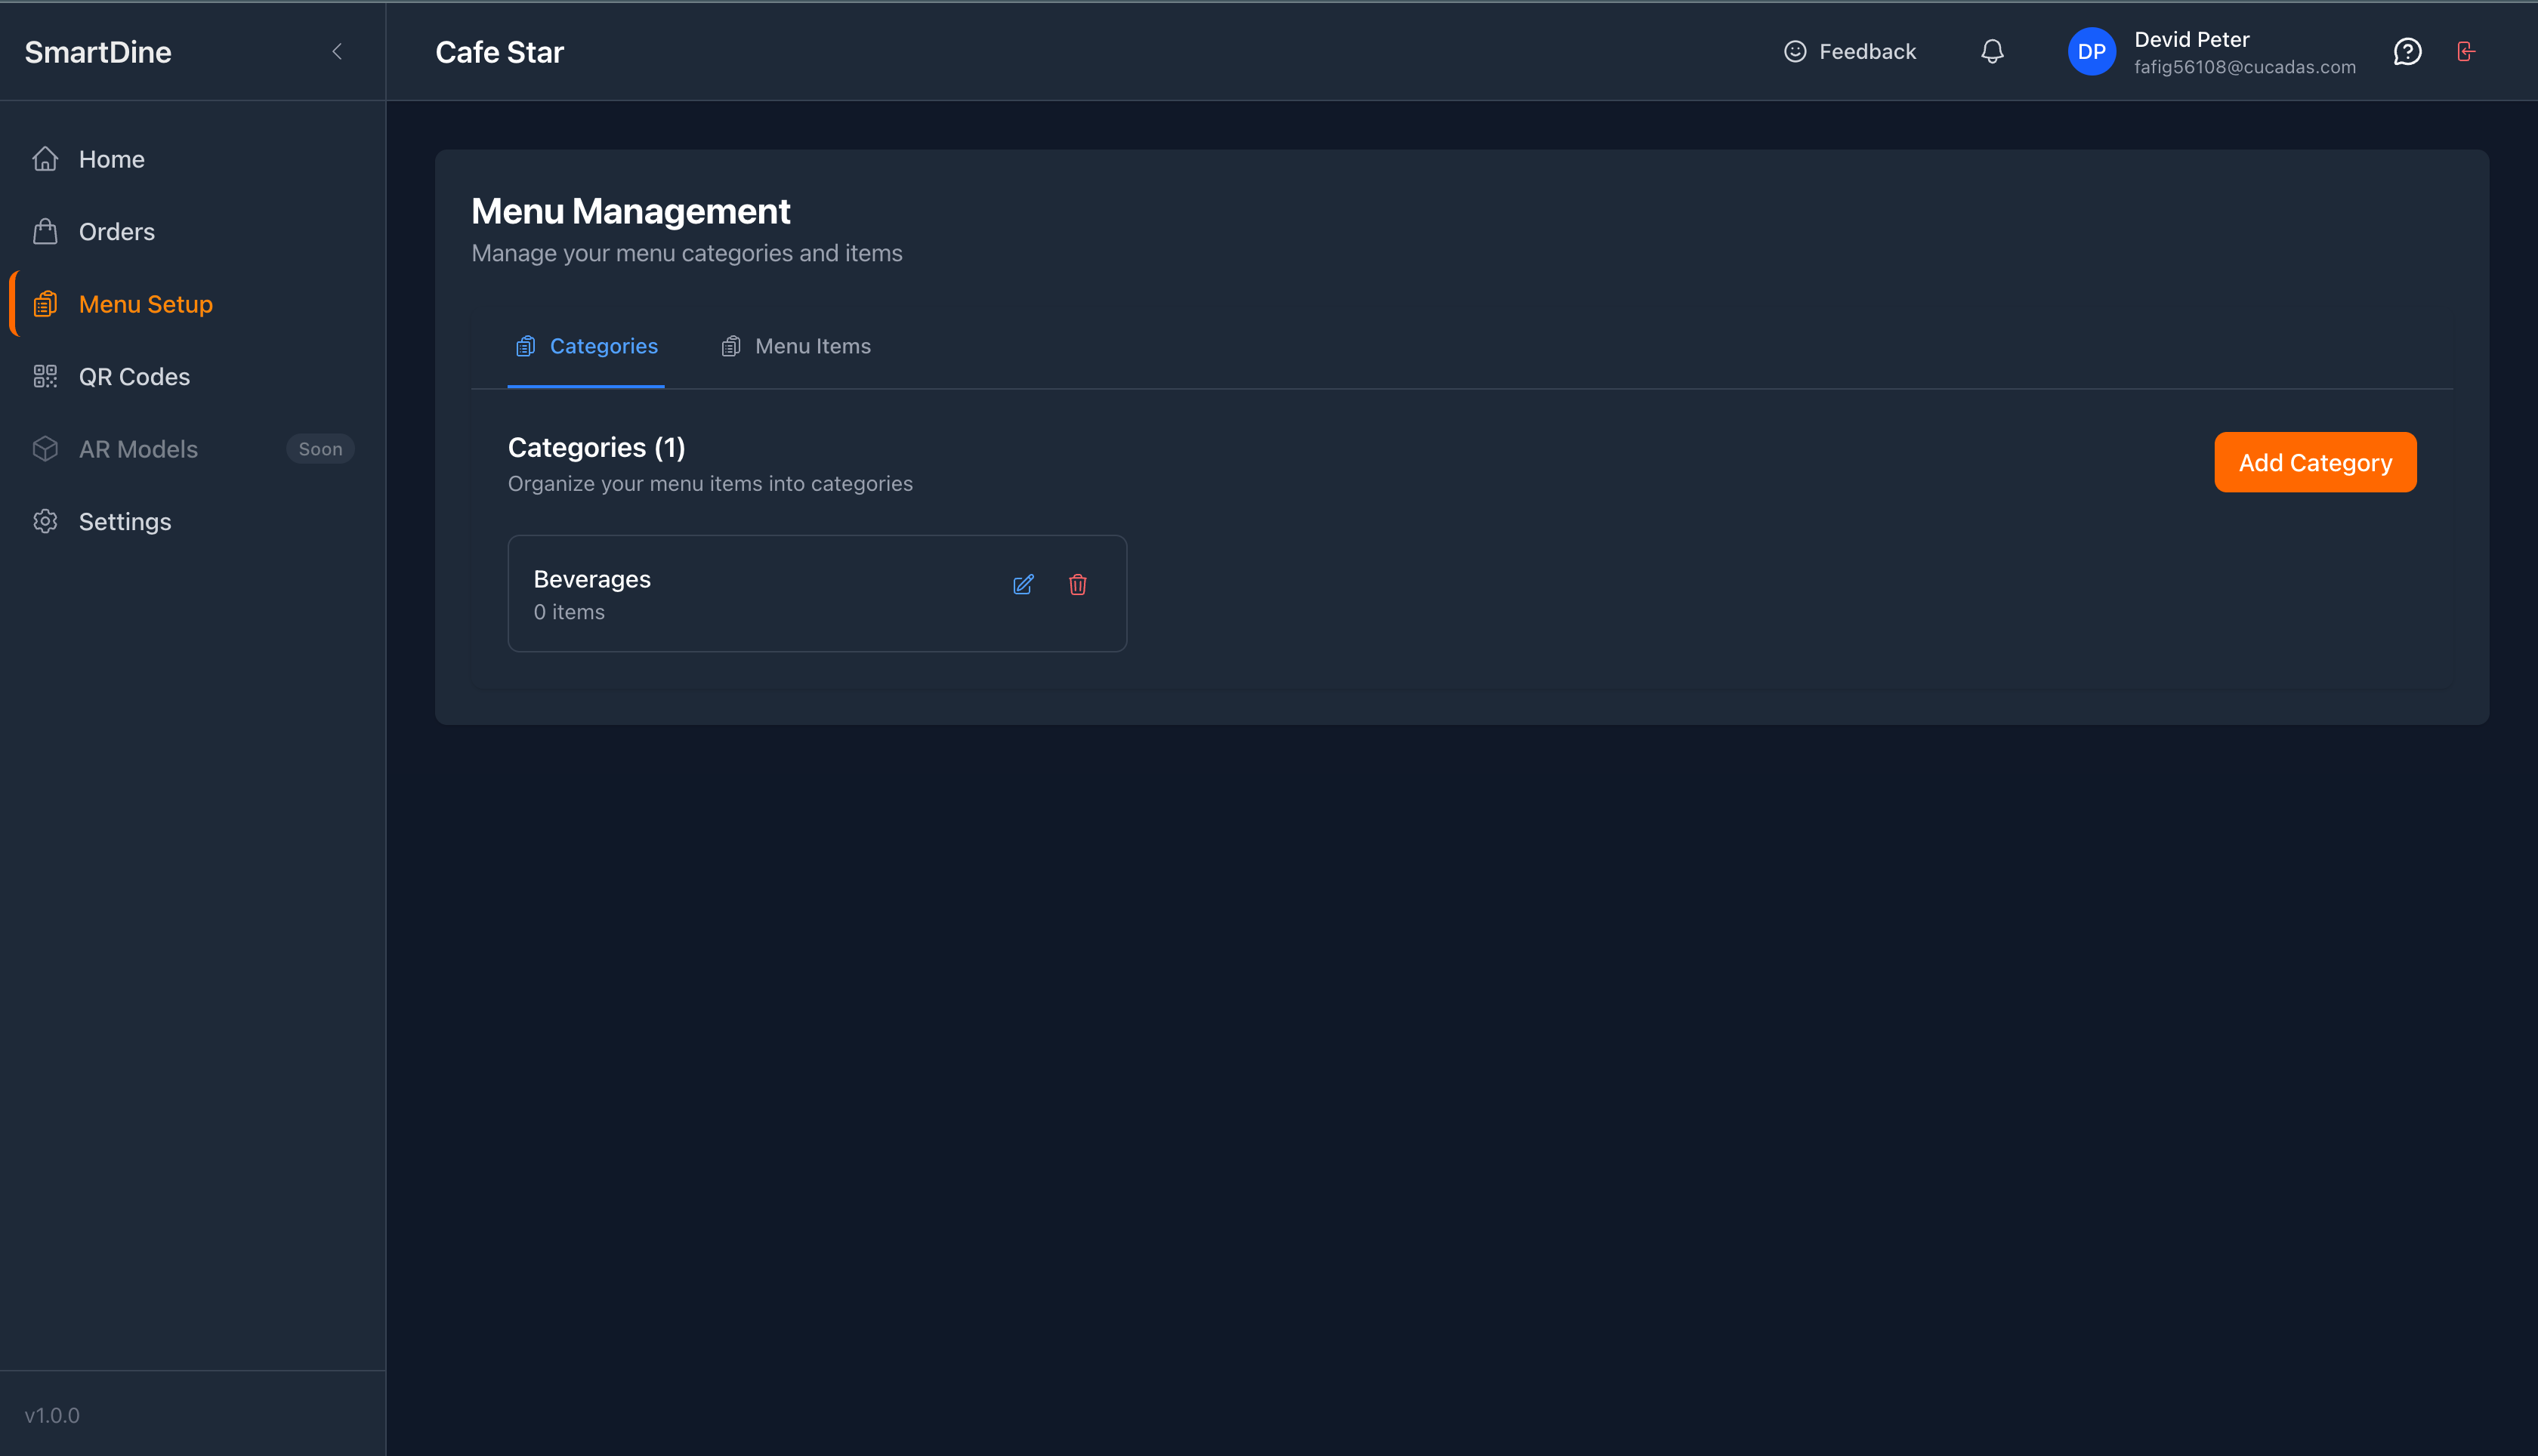
Menu Setup
This is where you add all your delicious food items and images.
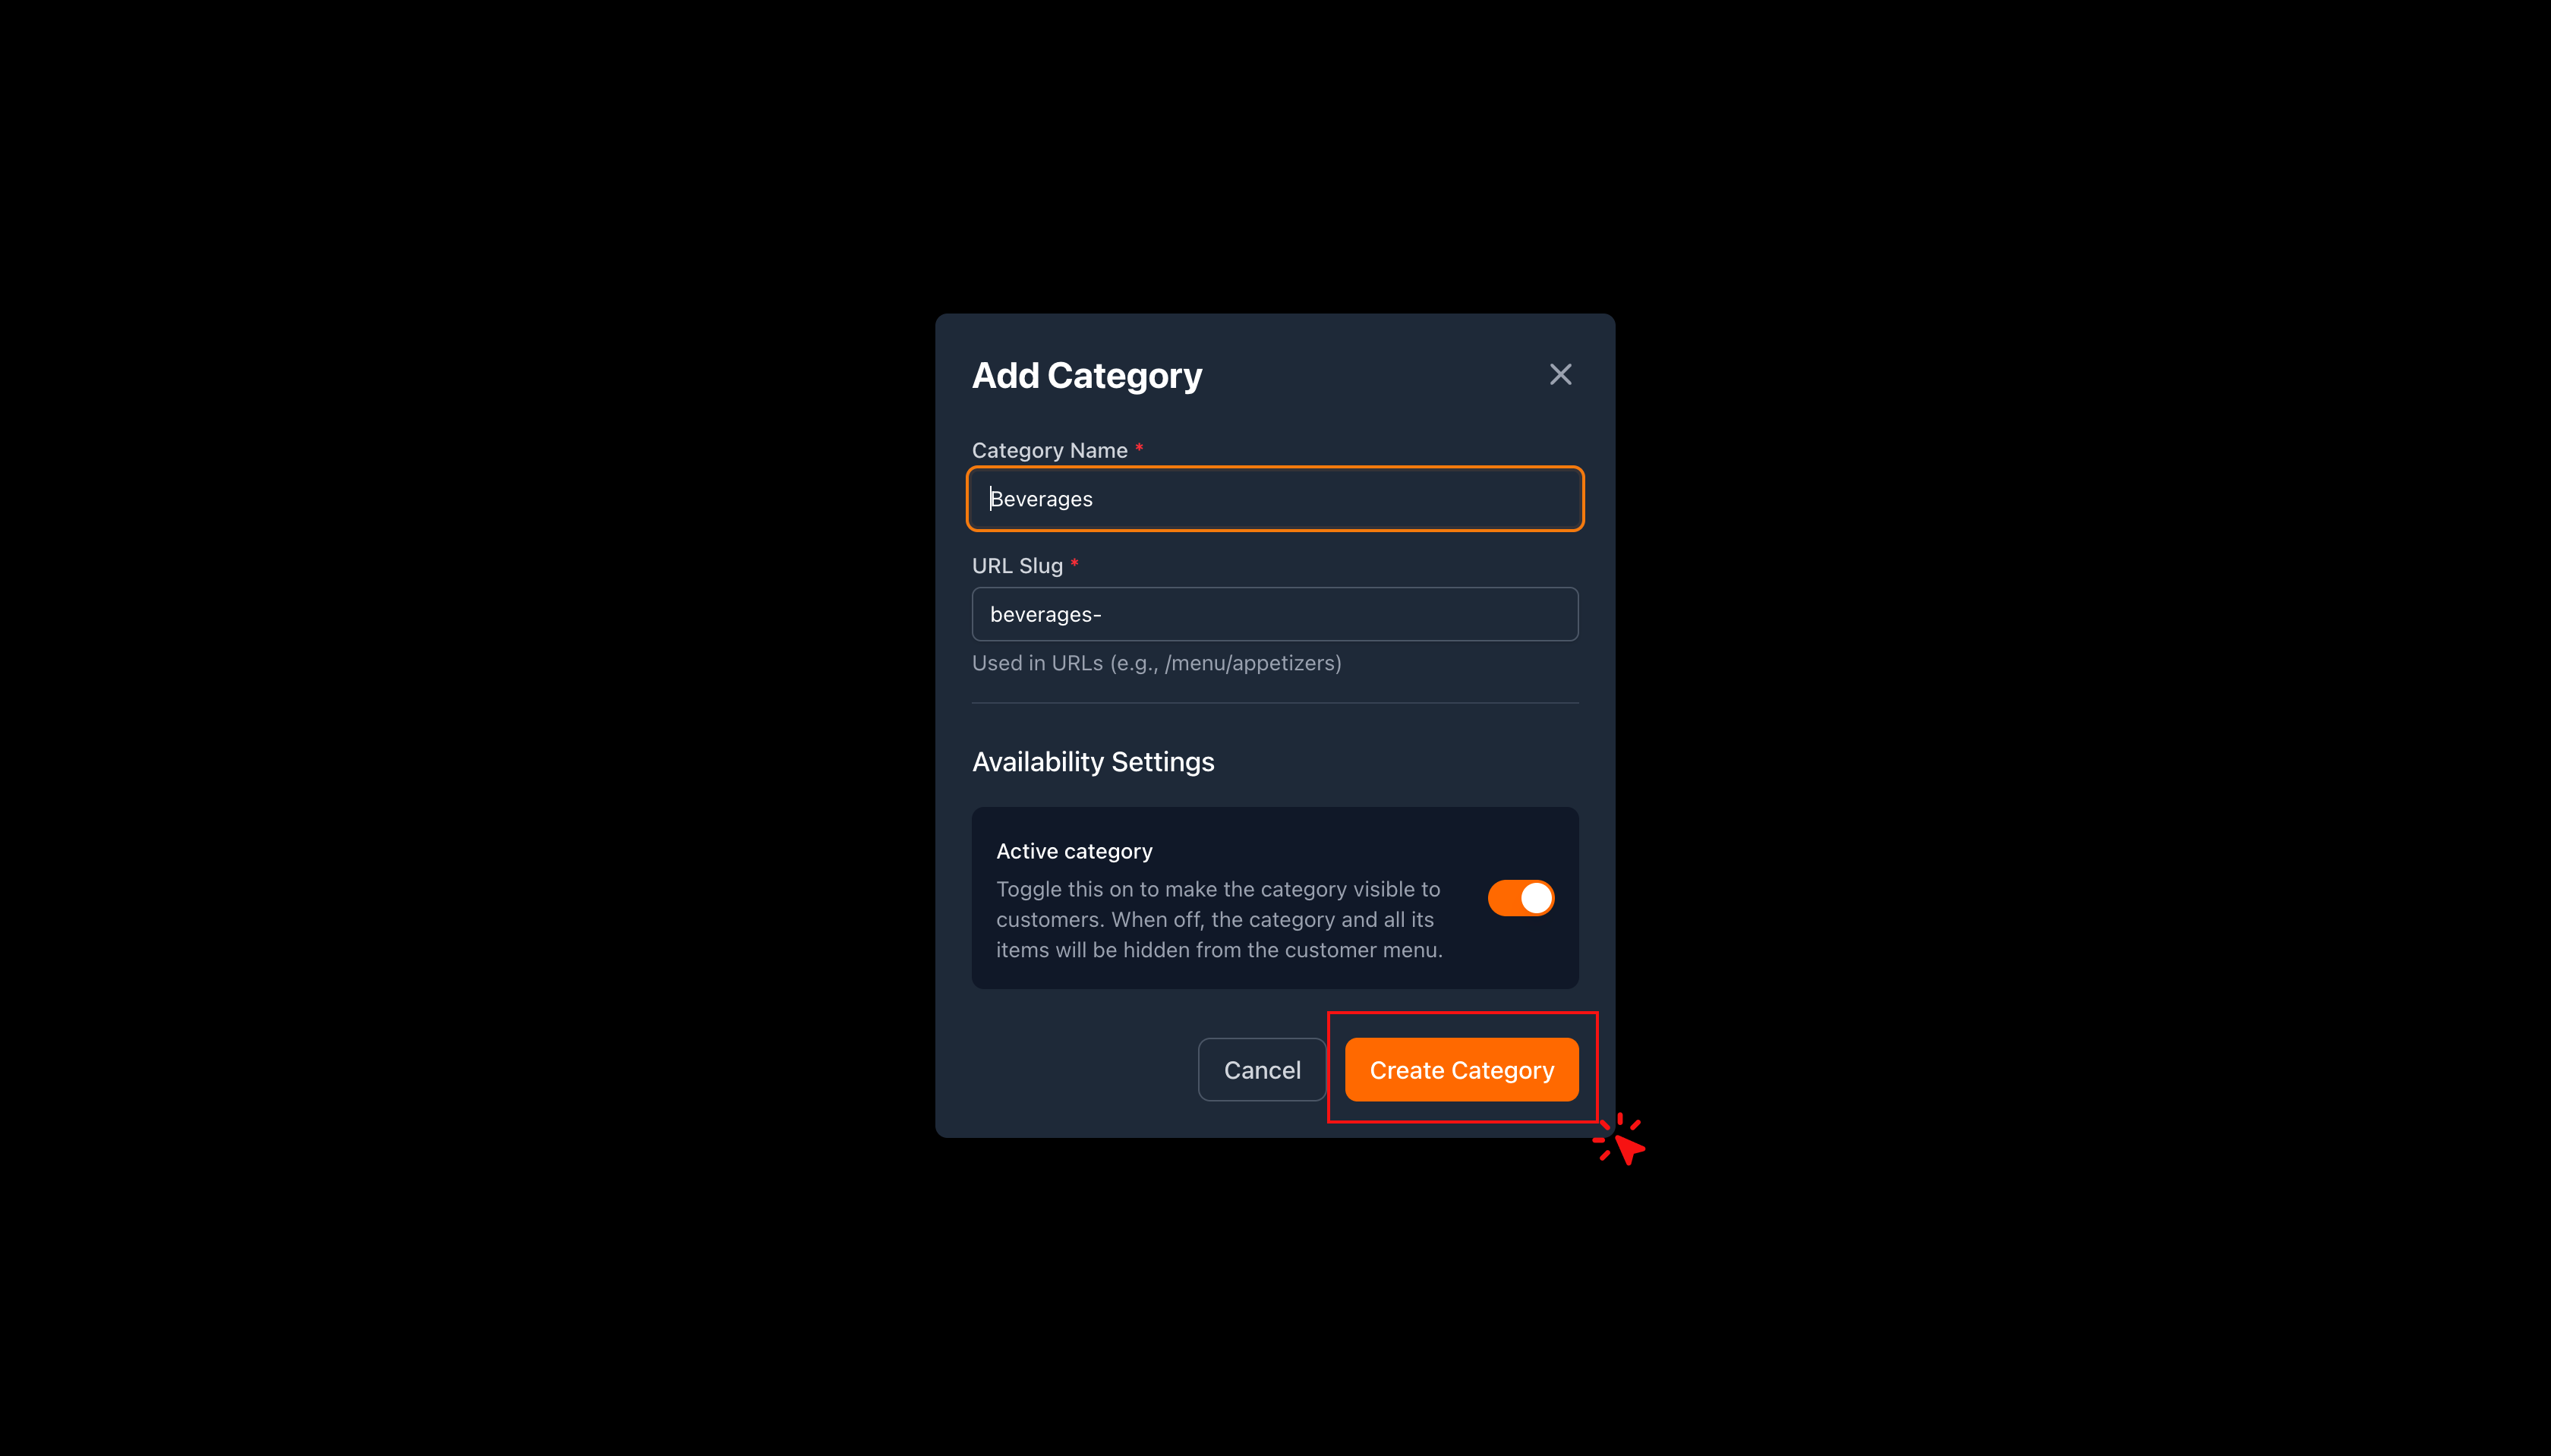
Add Categories
First, create the food categories you serve.
Examples: Beverages, Sandwiches, Salads, Desserts, etc.
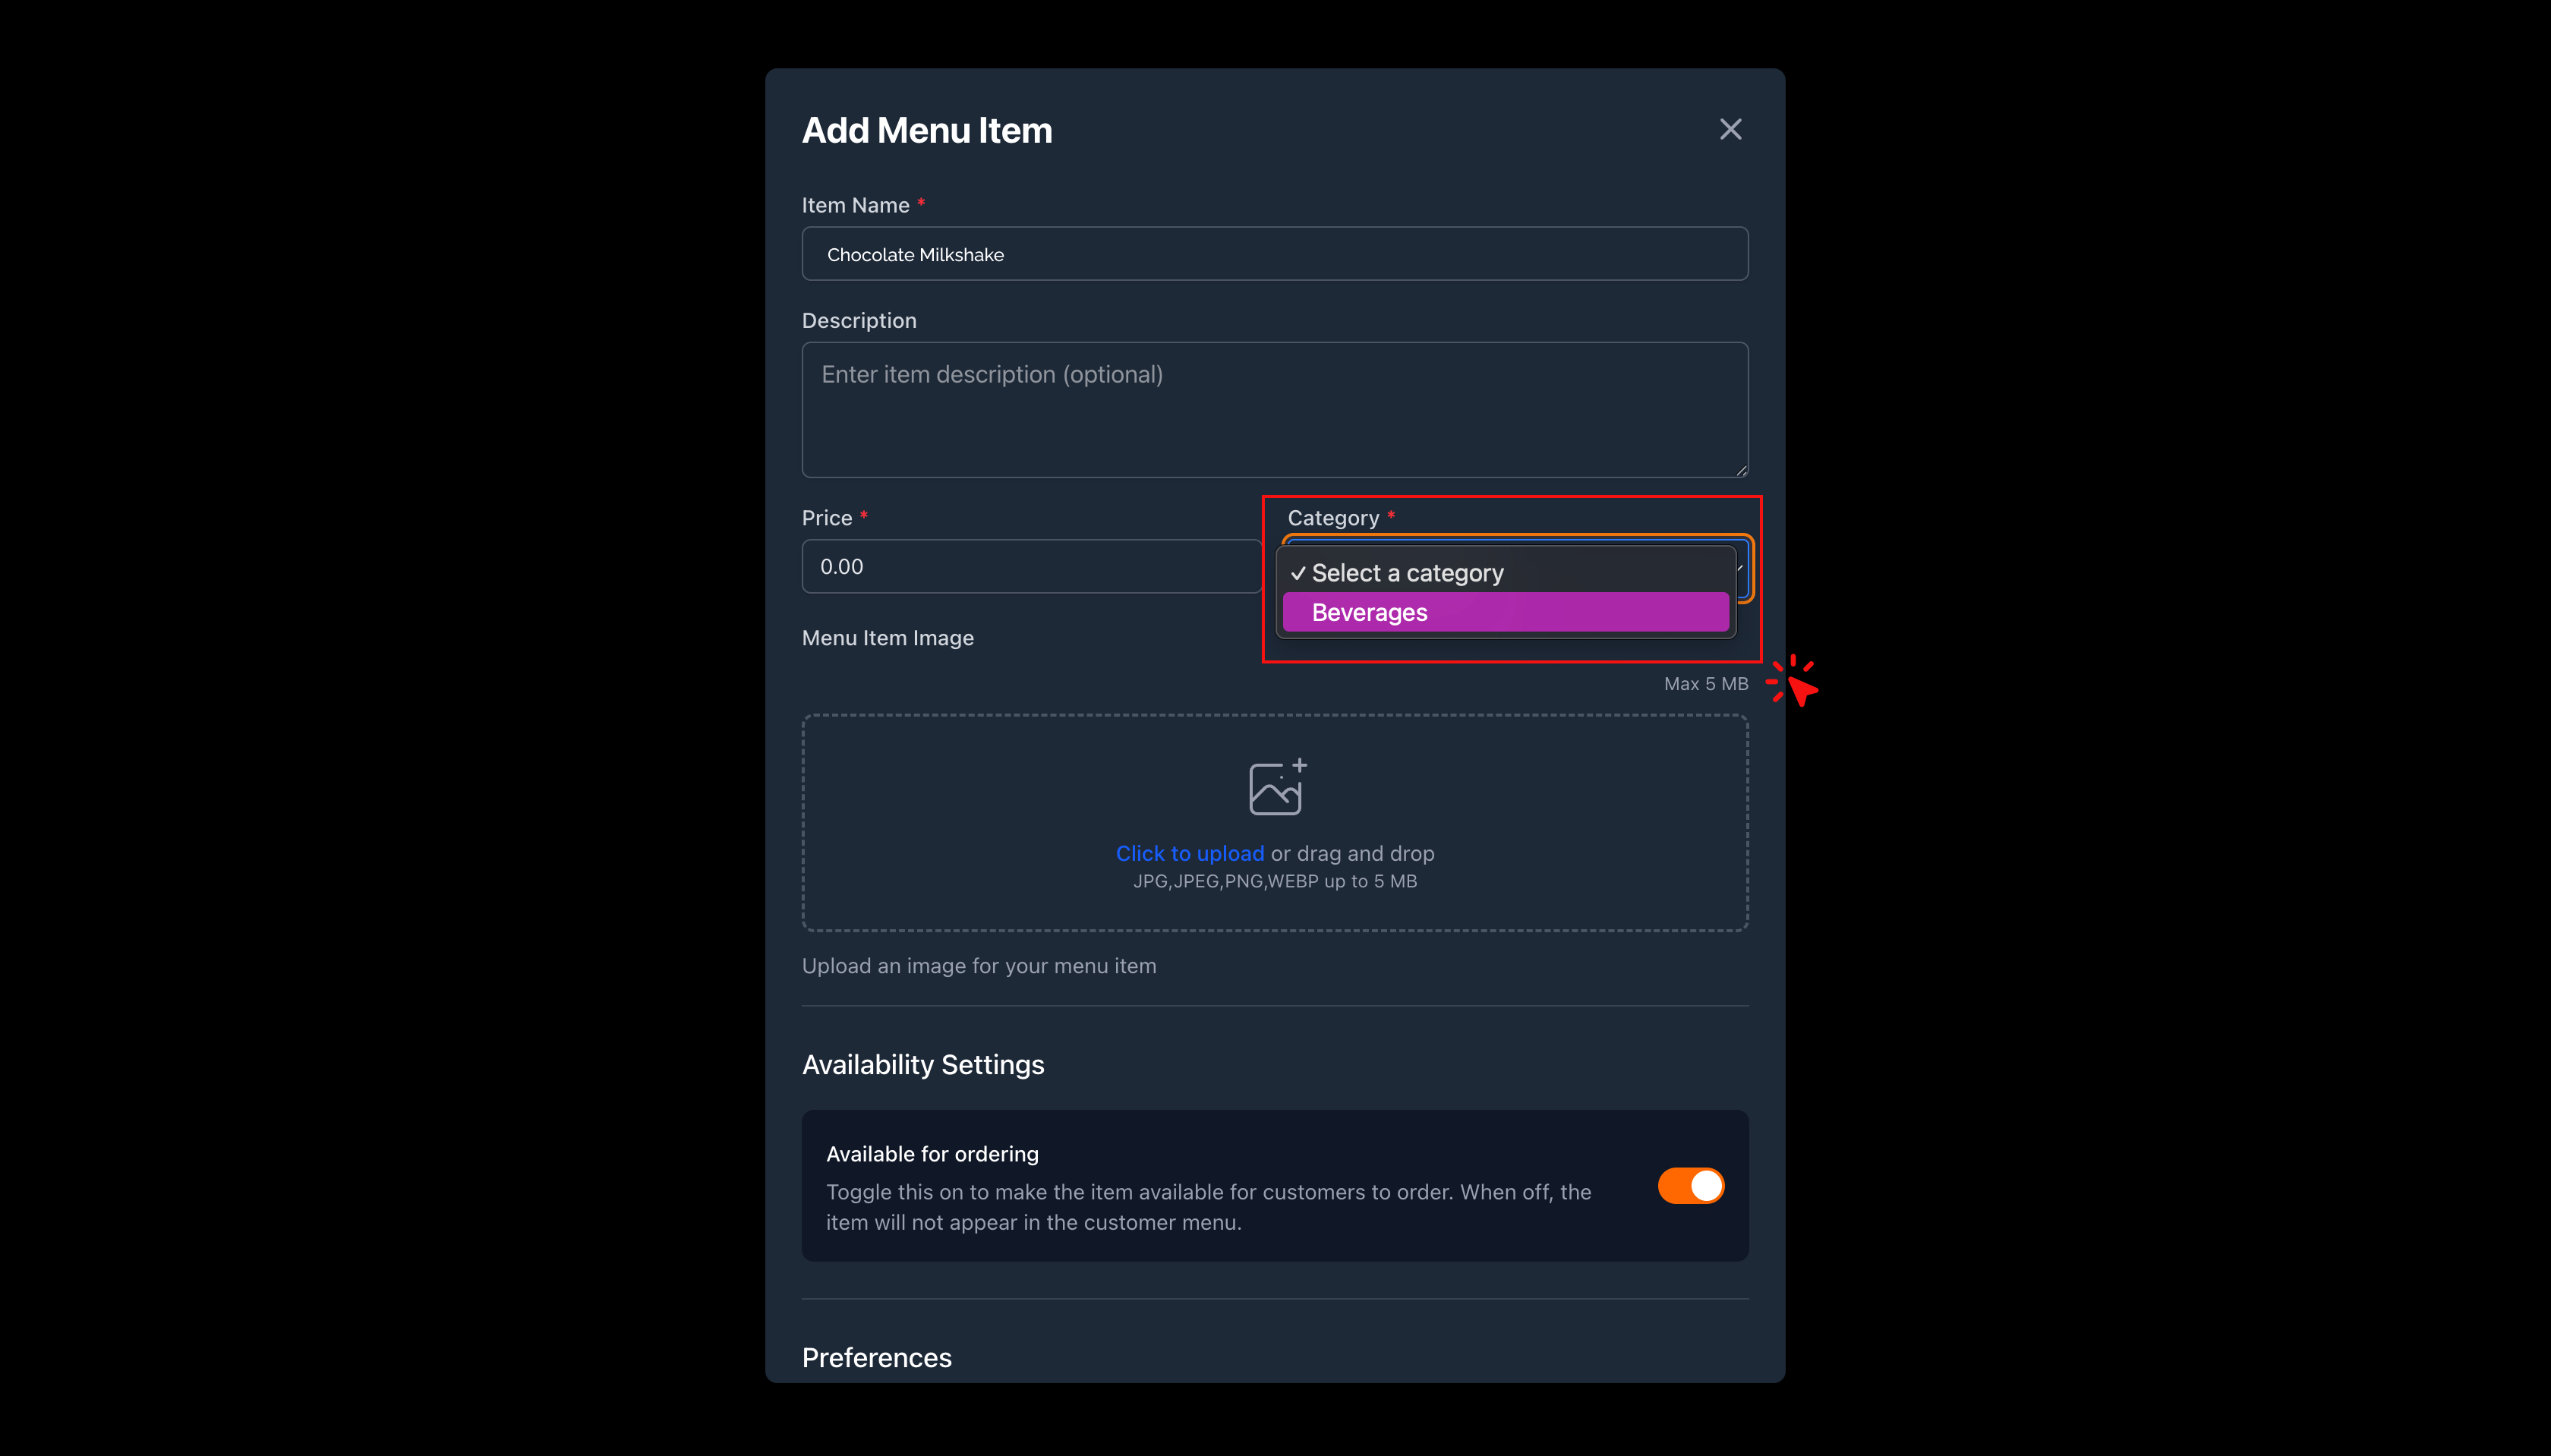
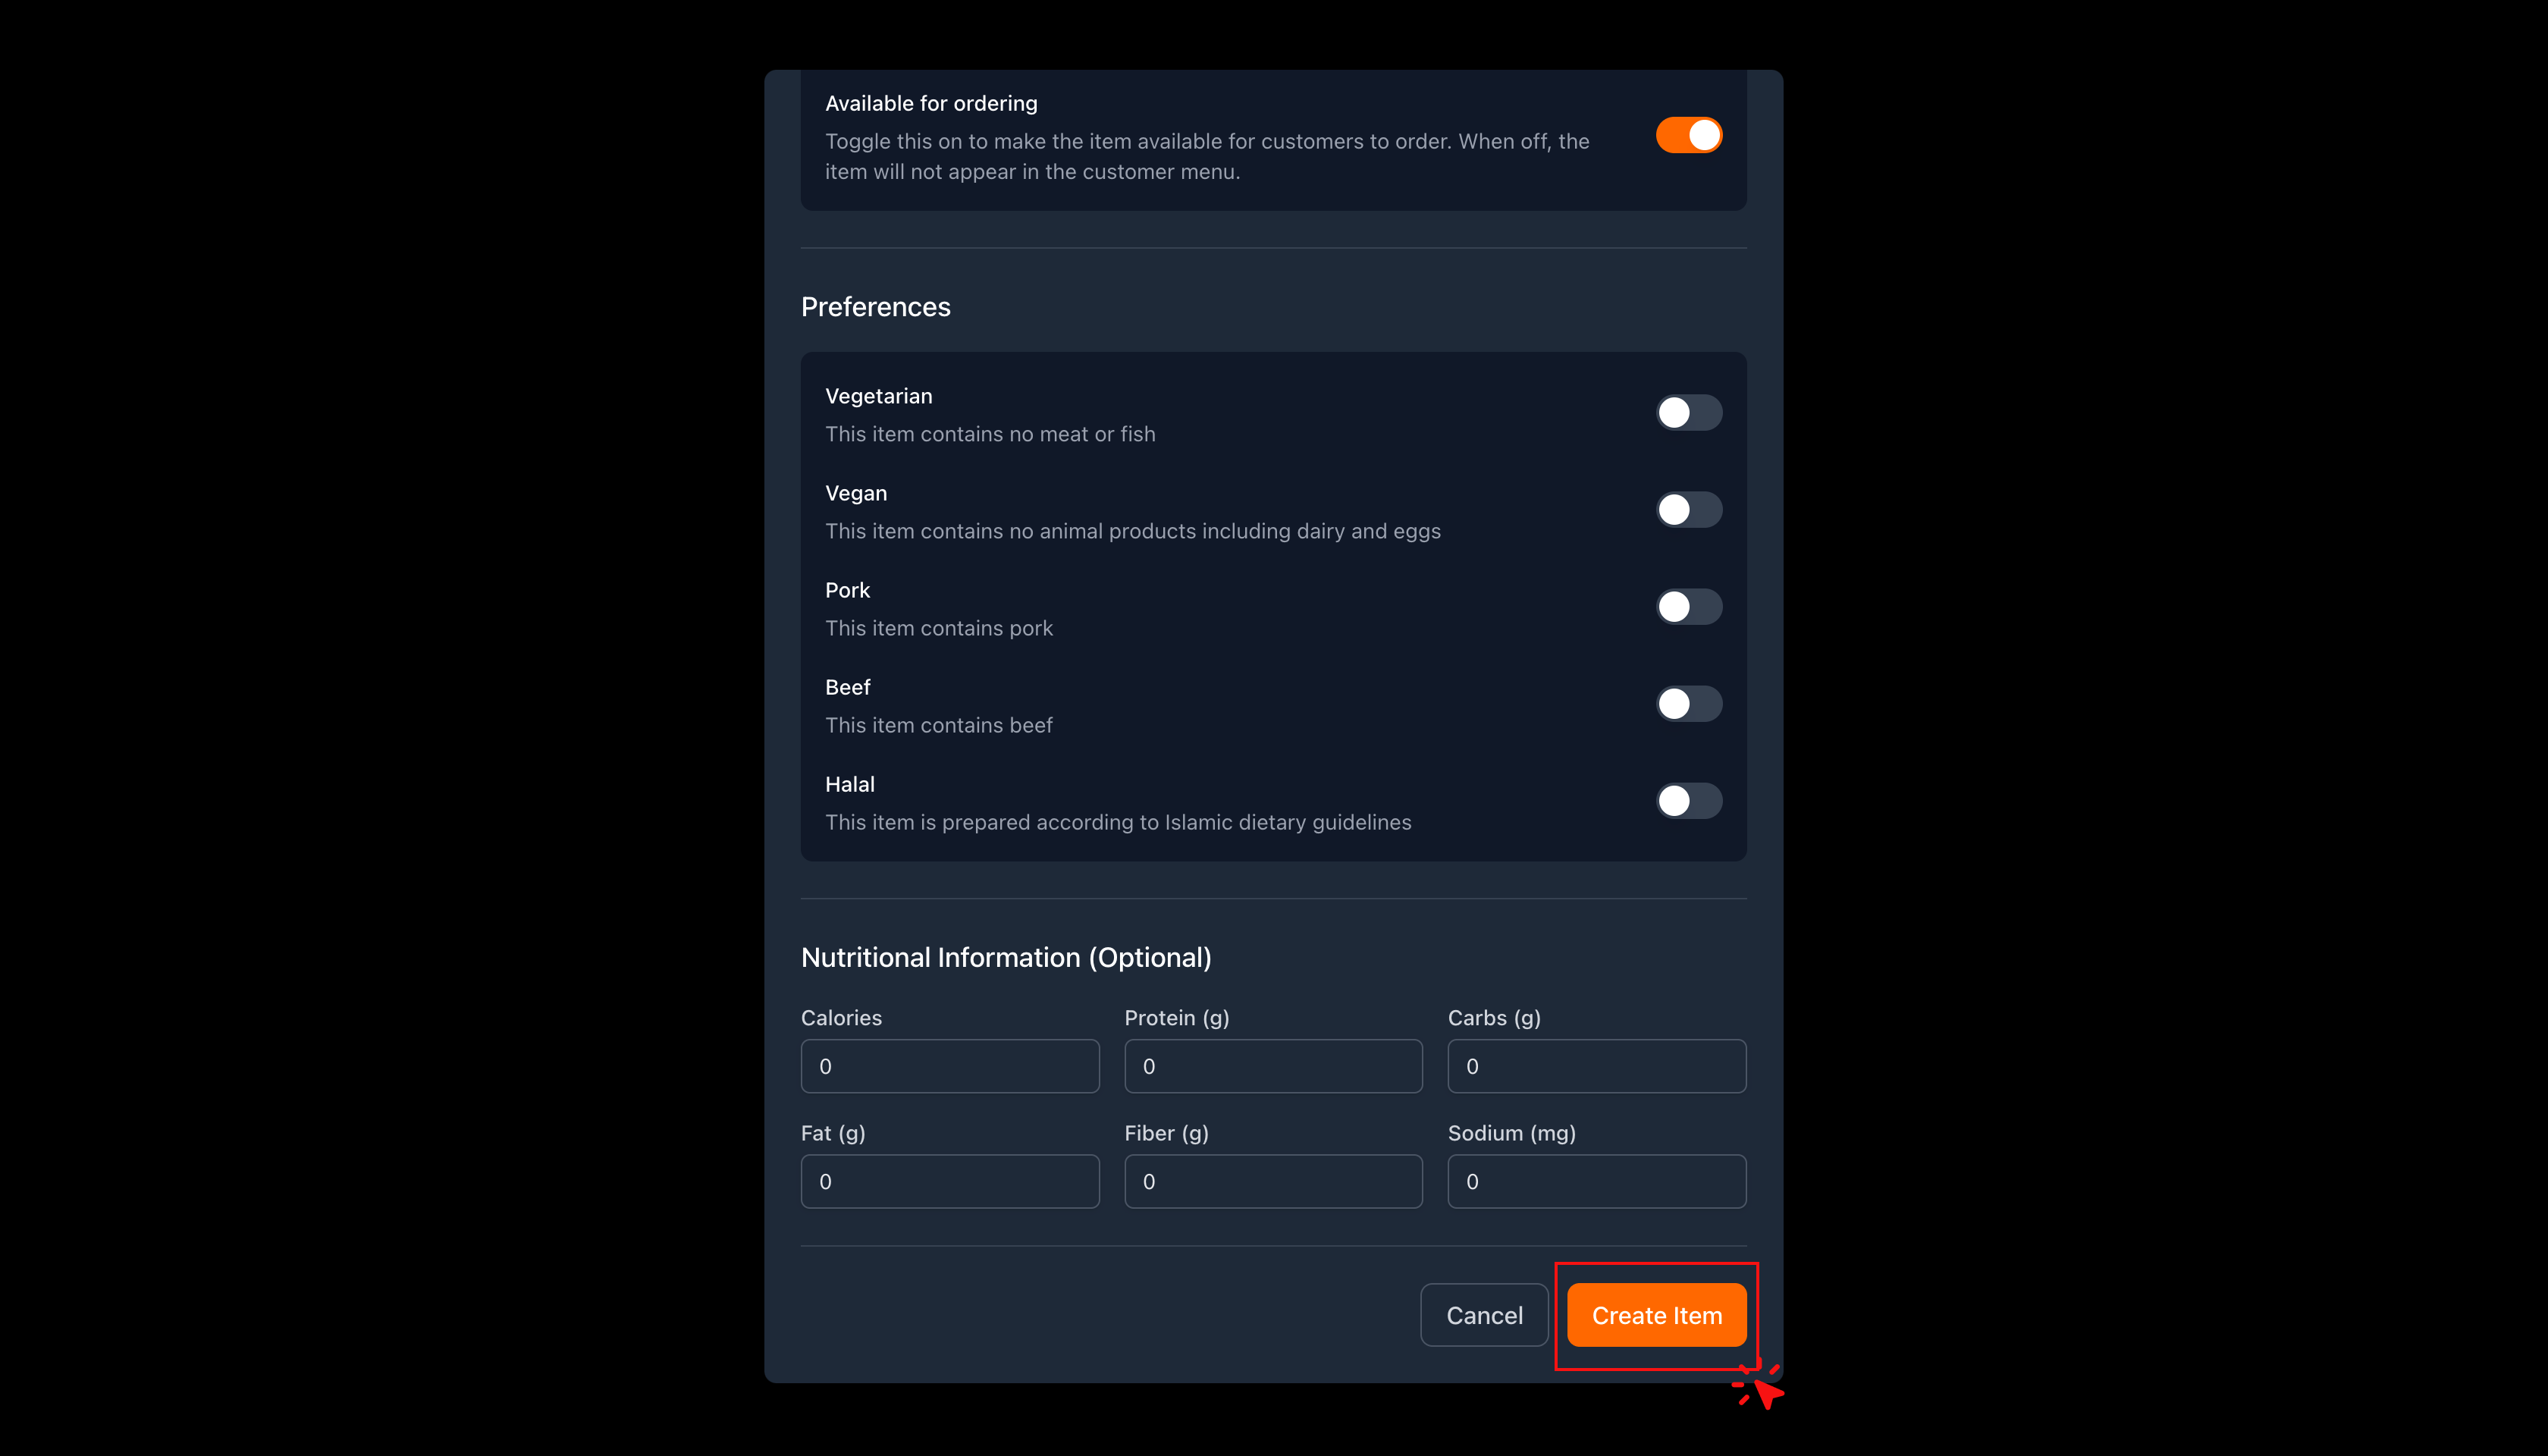
Add Menu Items
Add menu items under each pre-created category.
Include item name, price, and images.
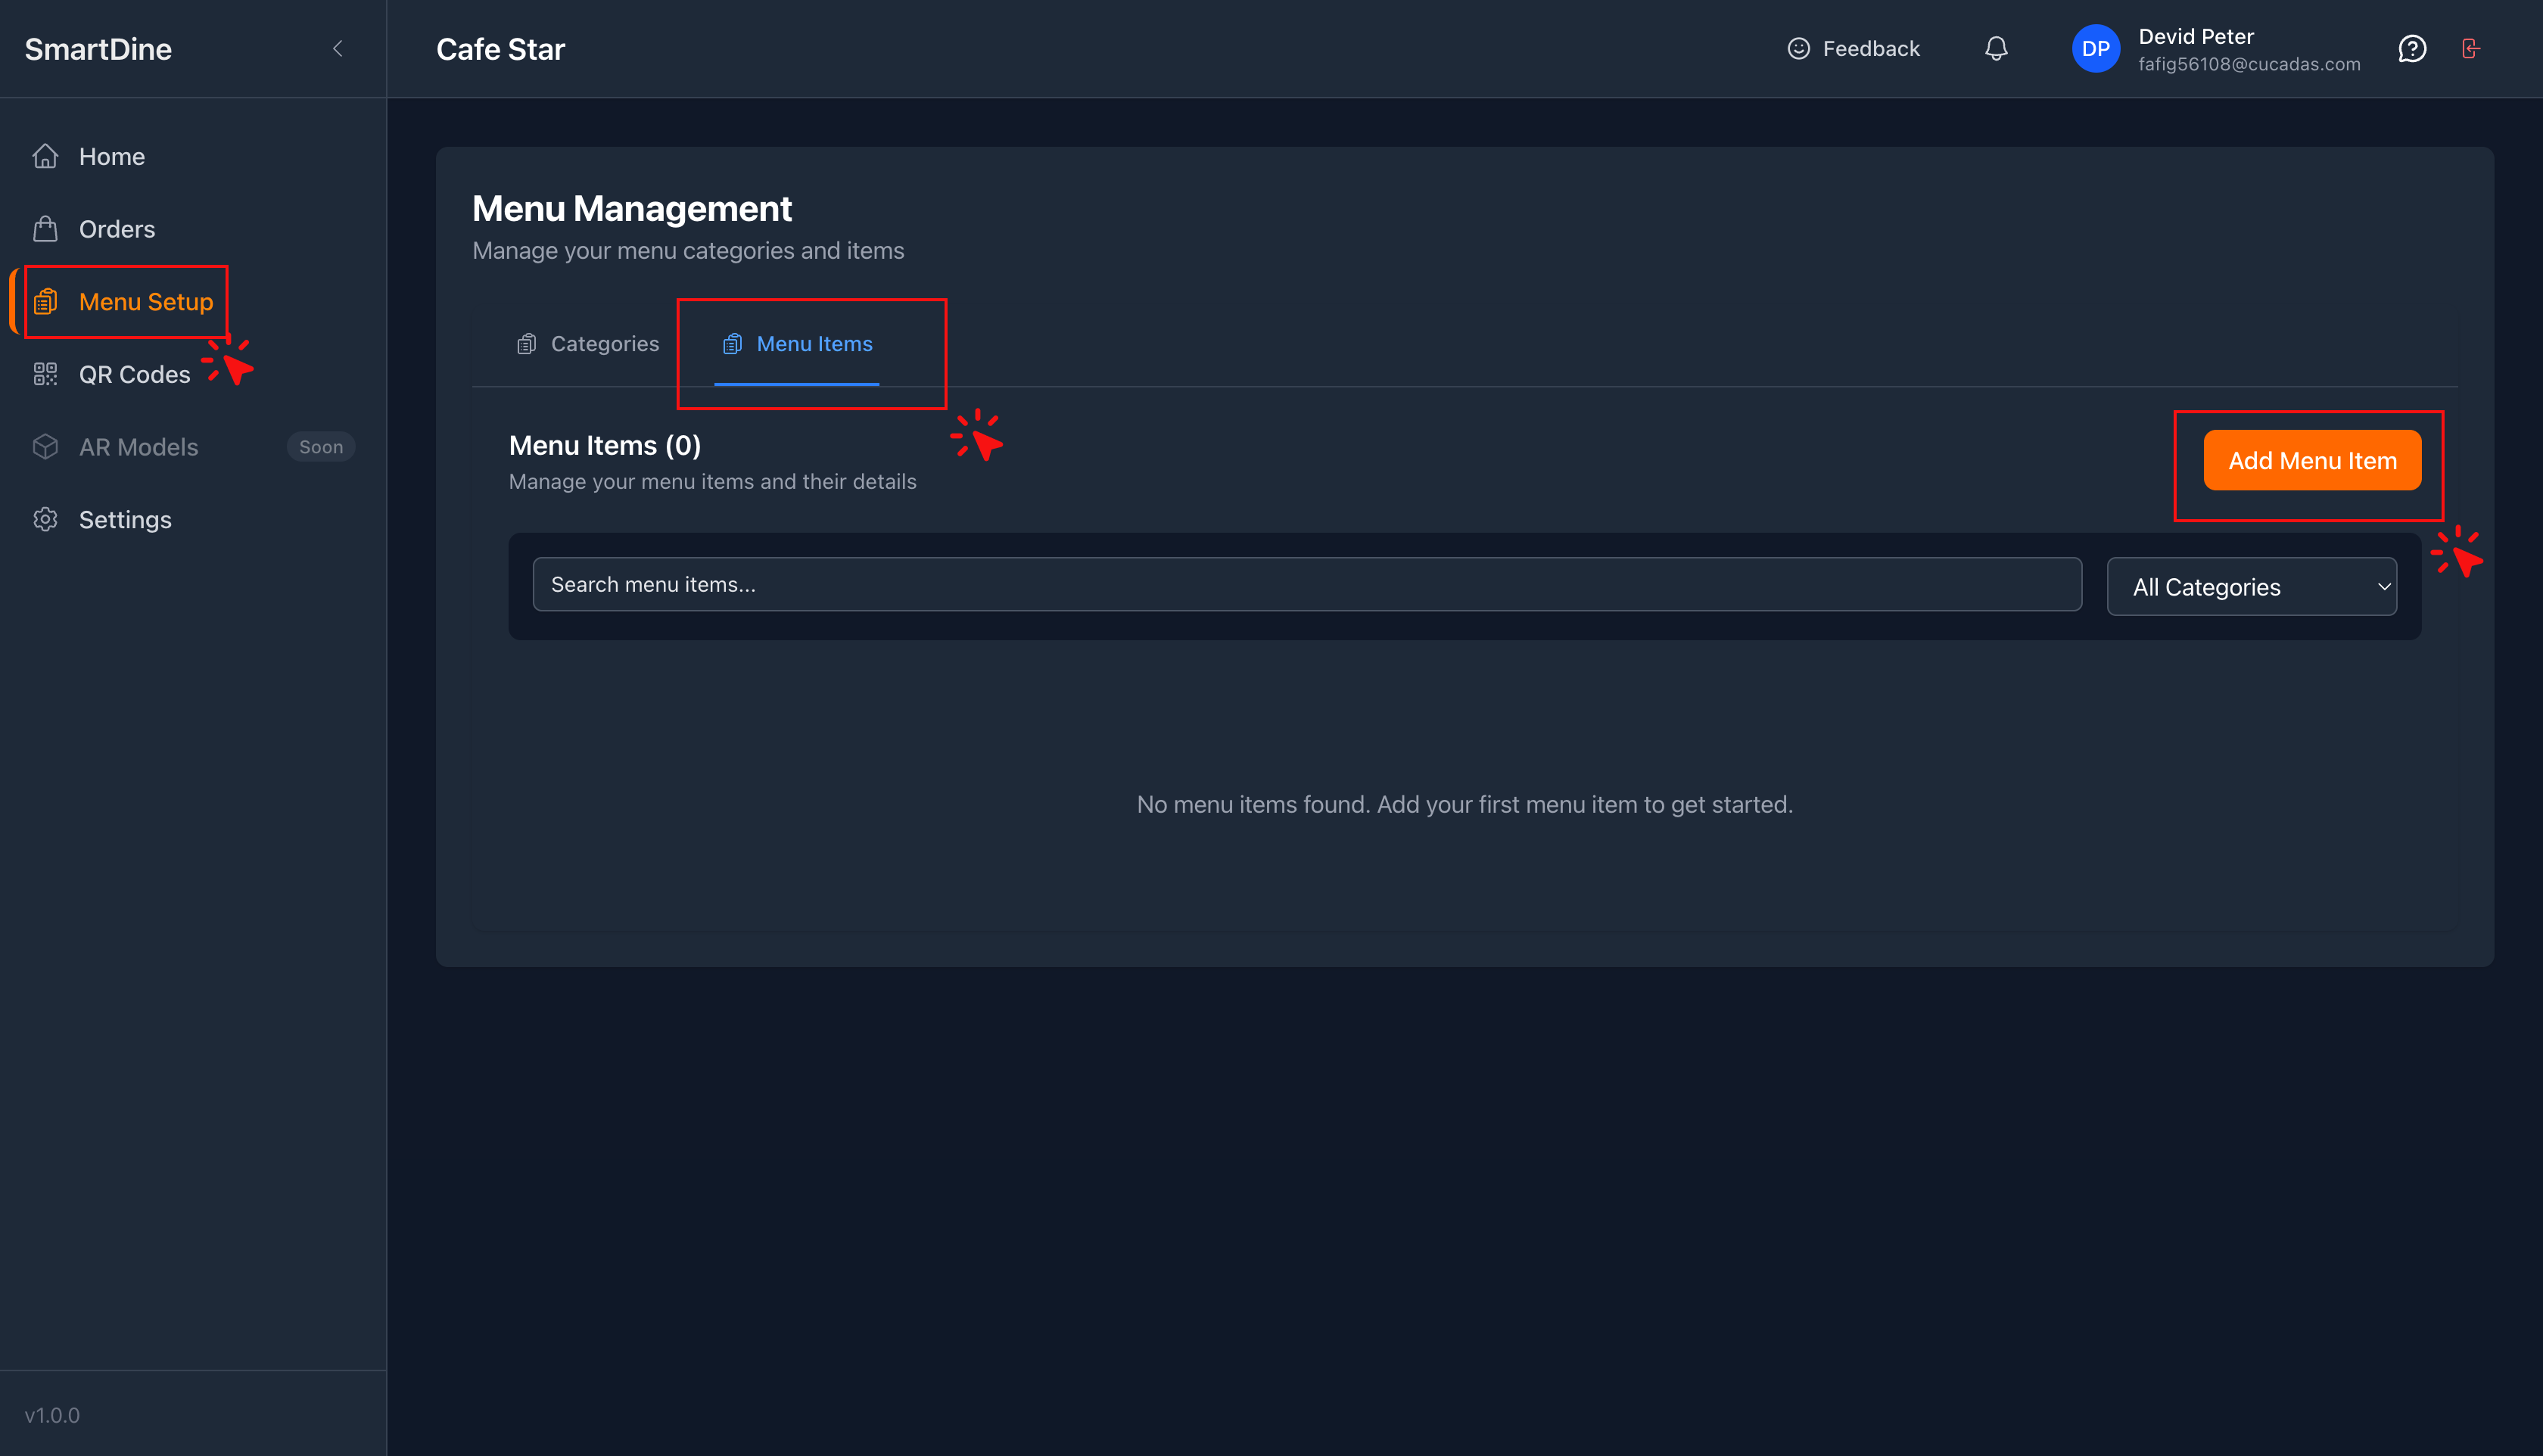
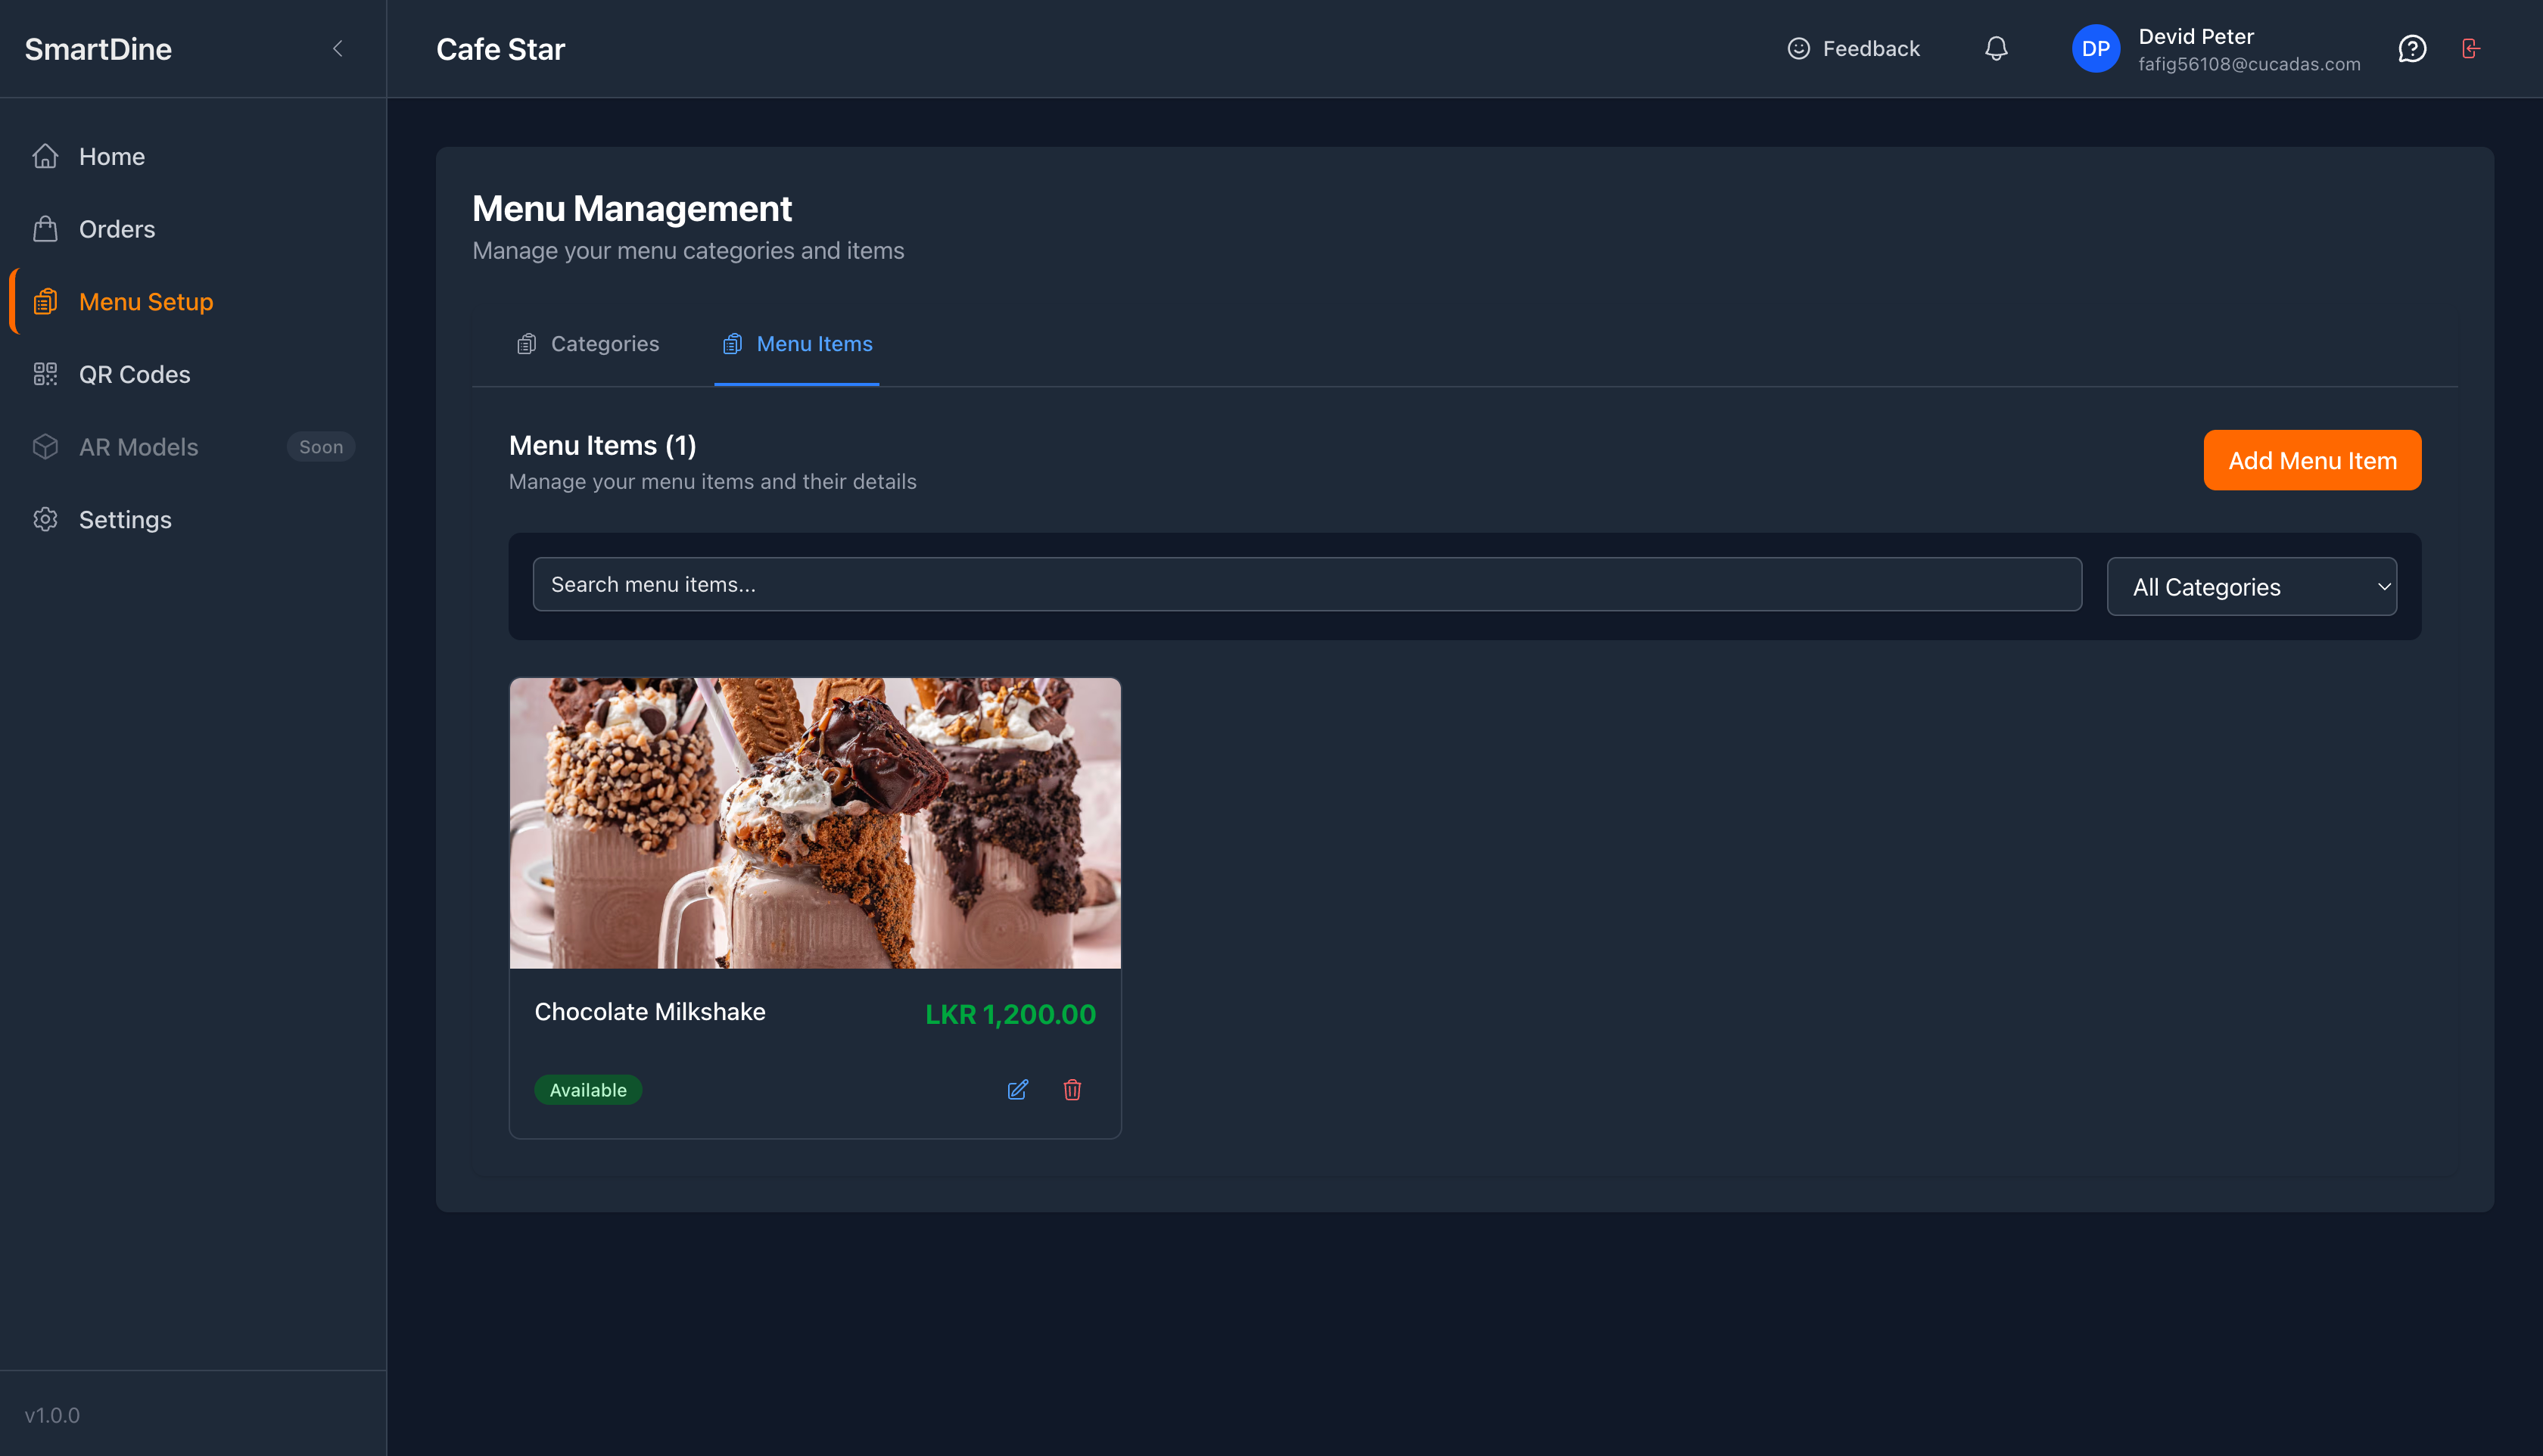
Tip: If you have many menu items, use filters to quickly find and manage them.
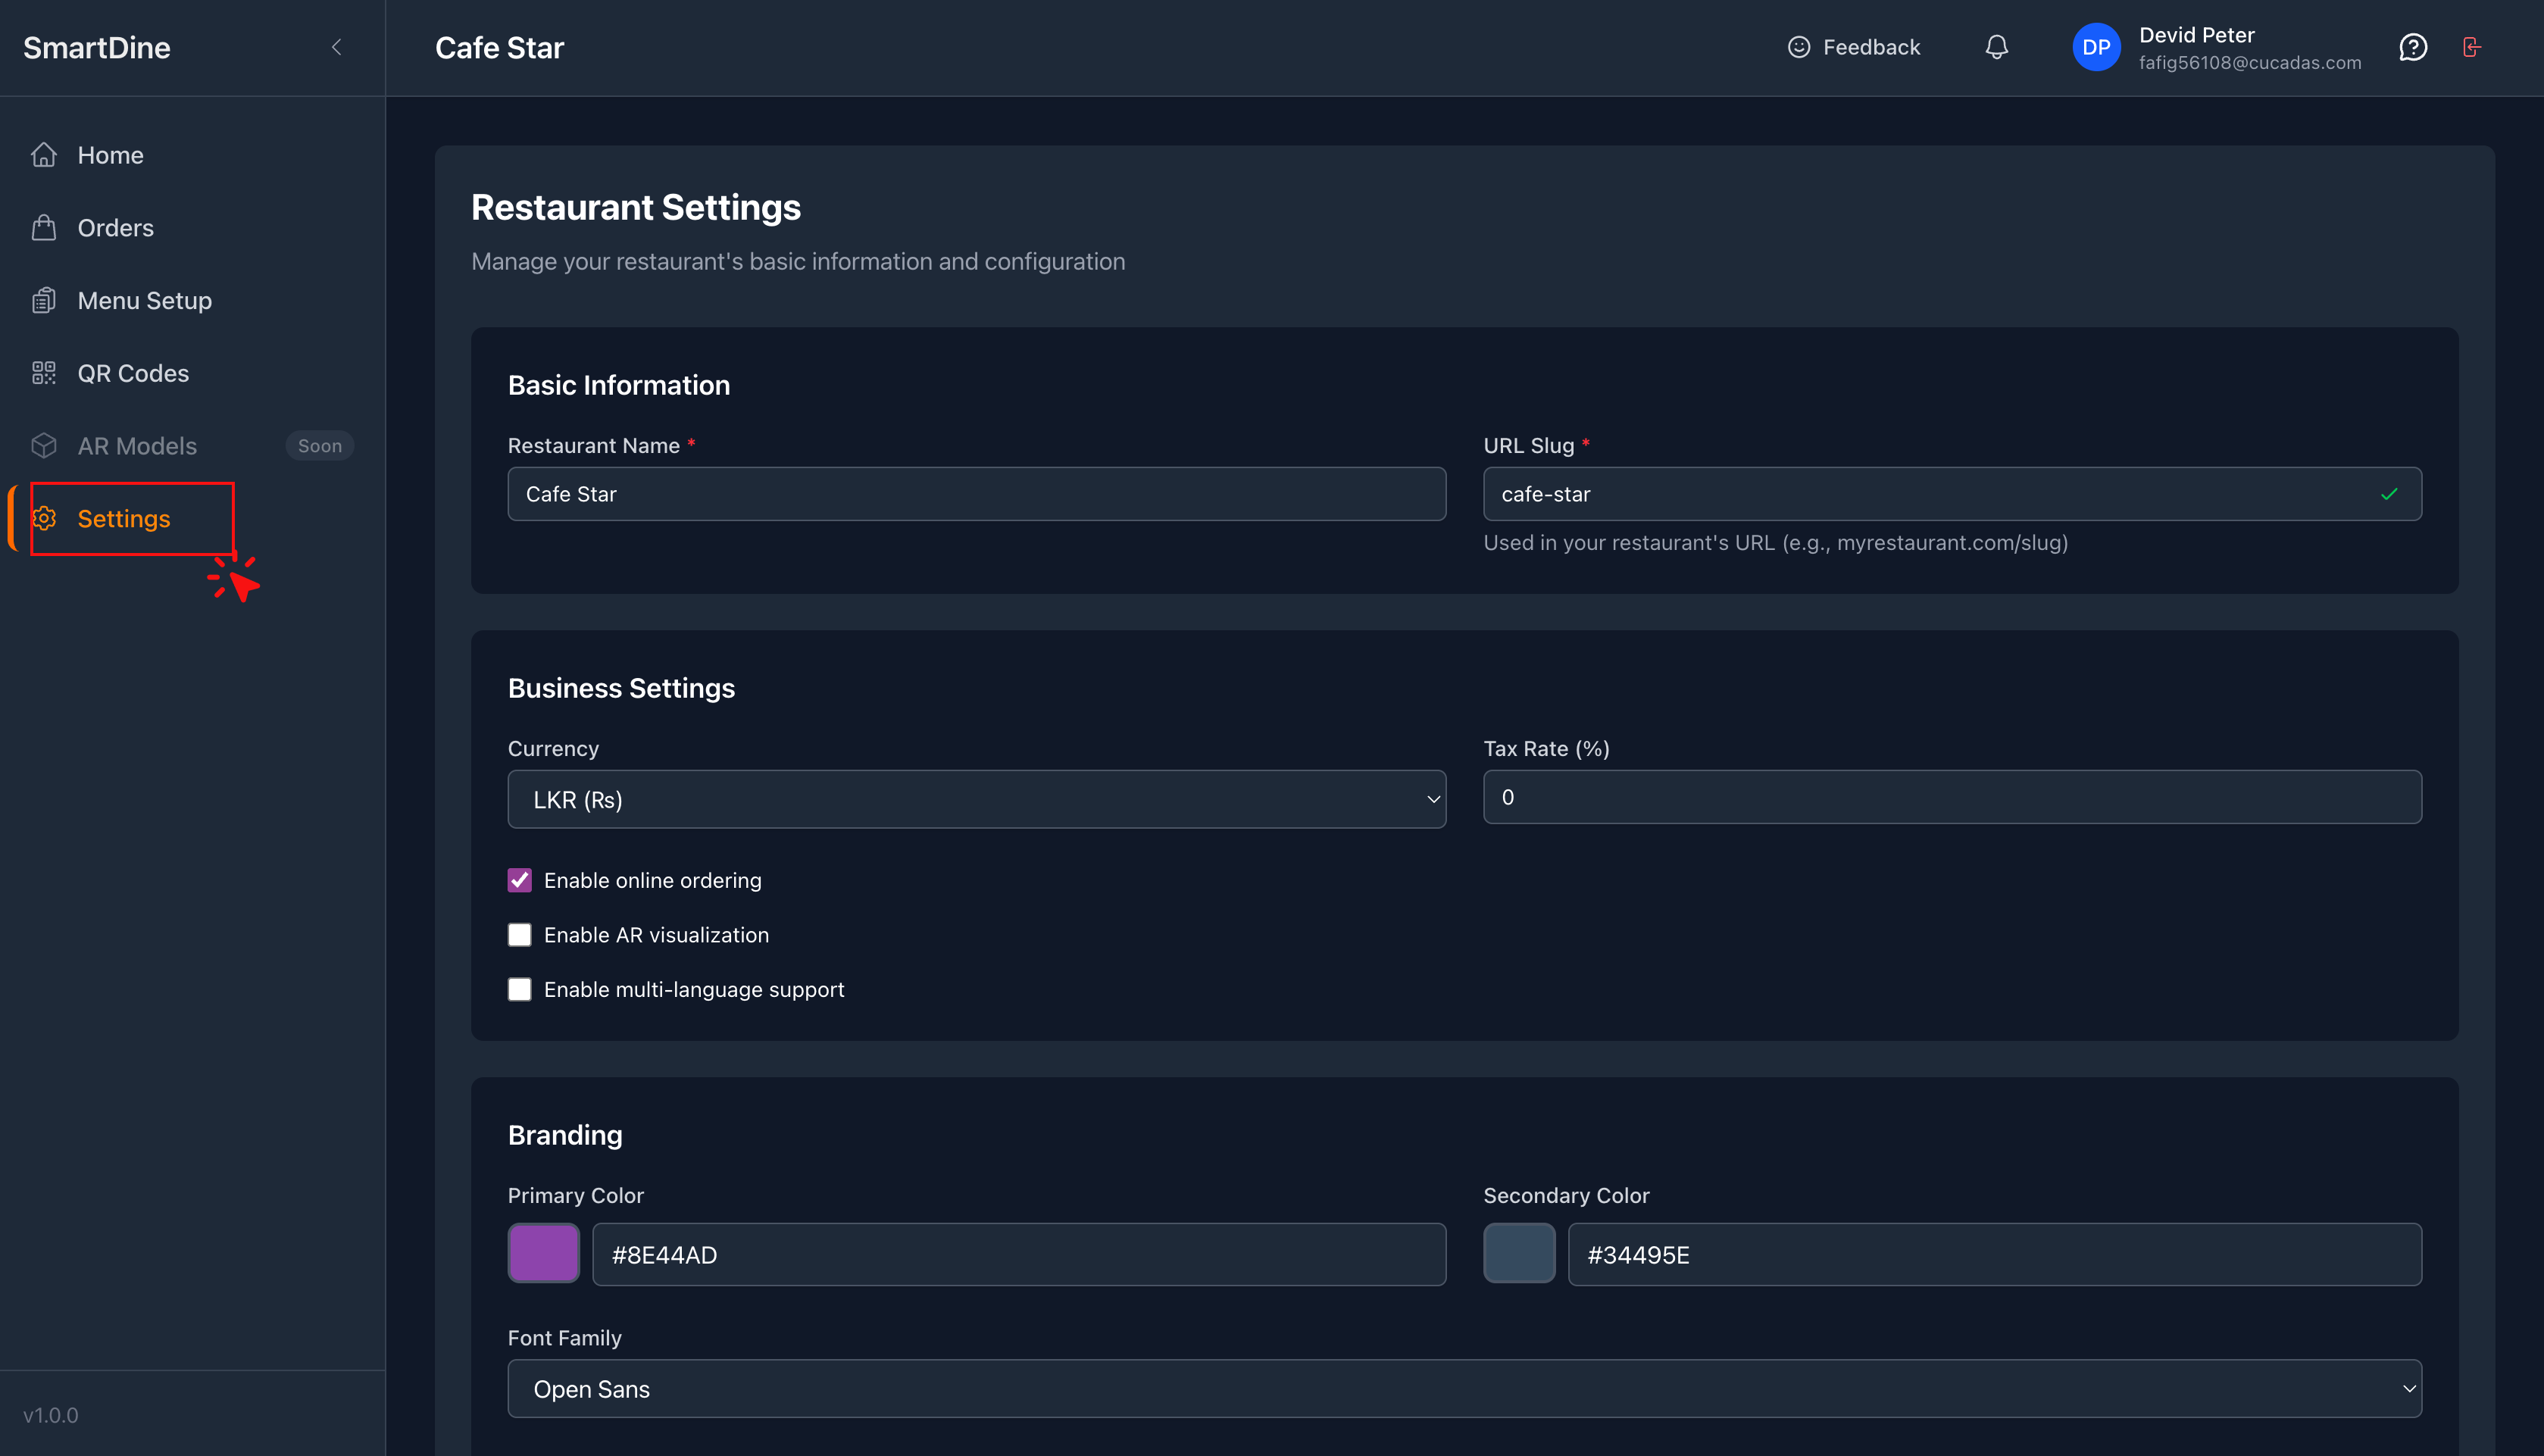
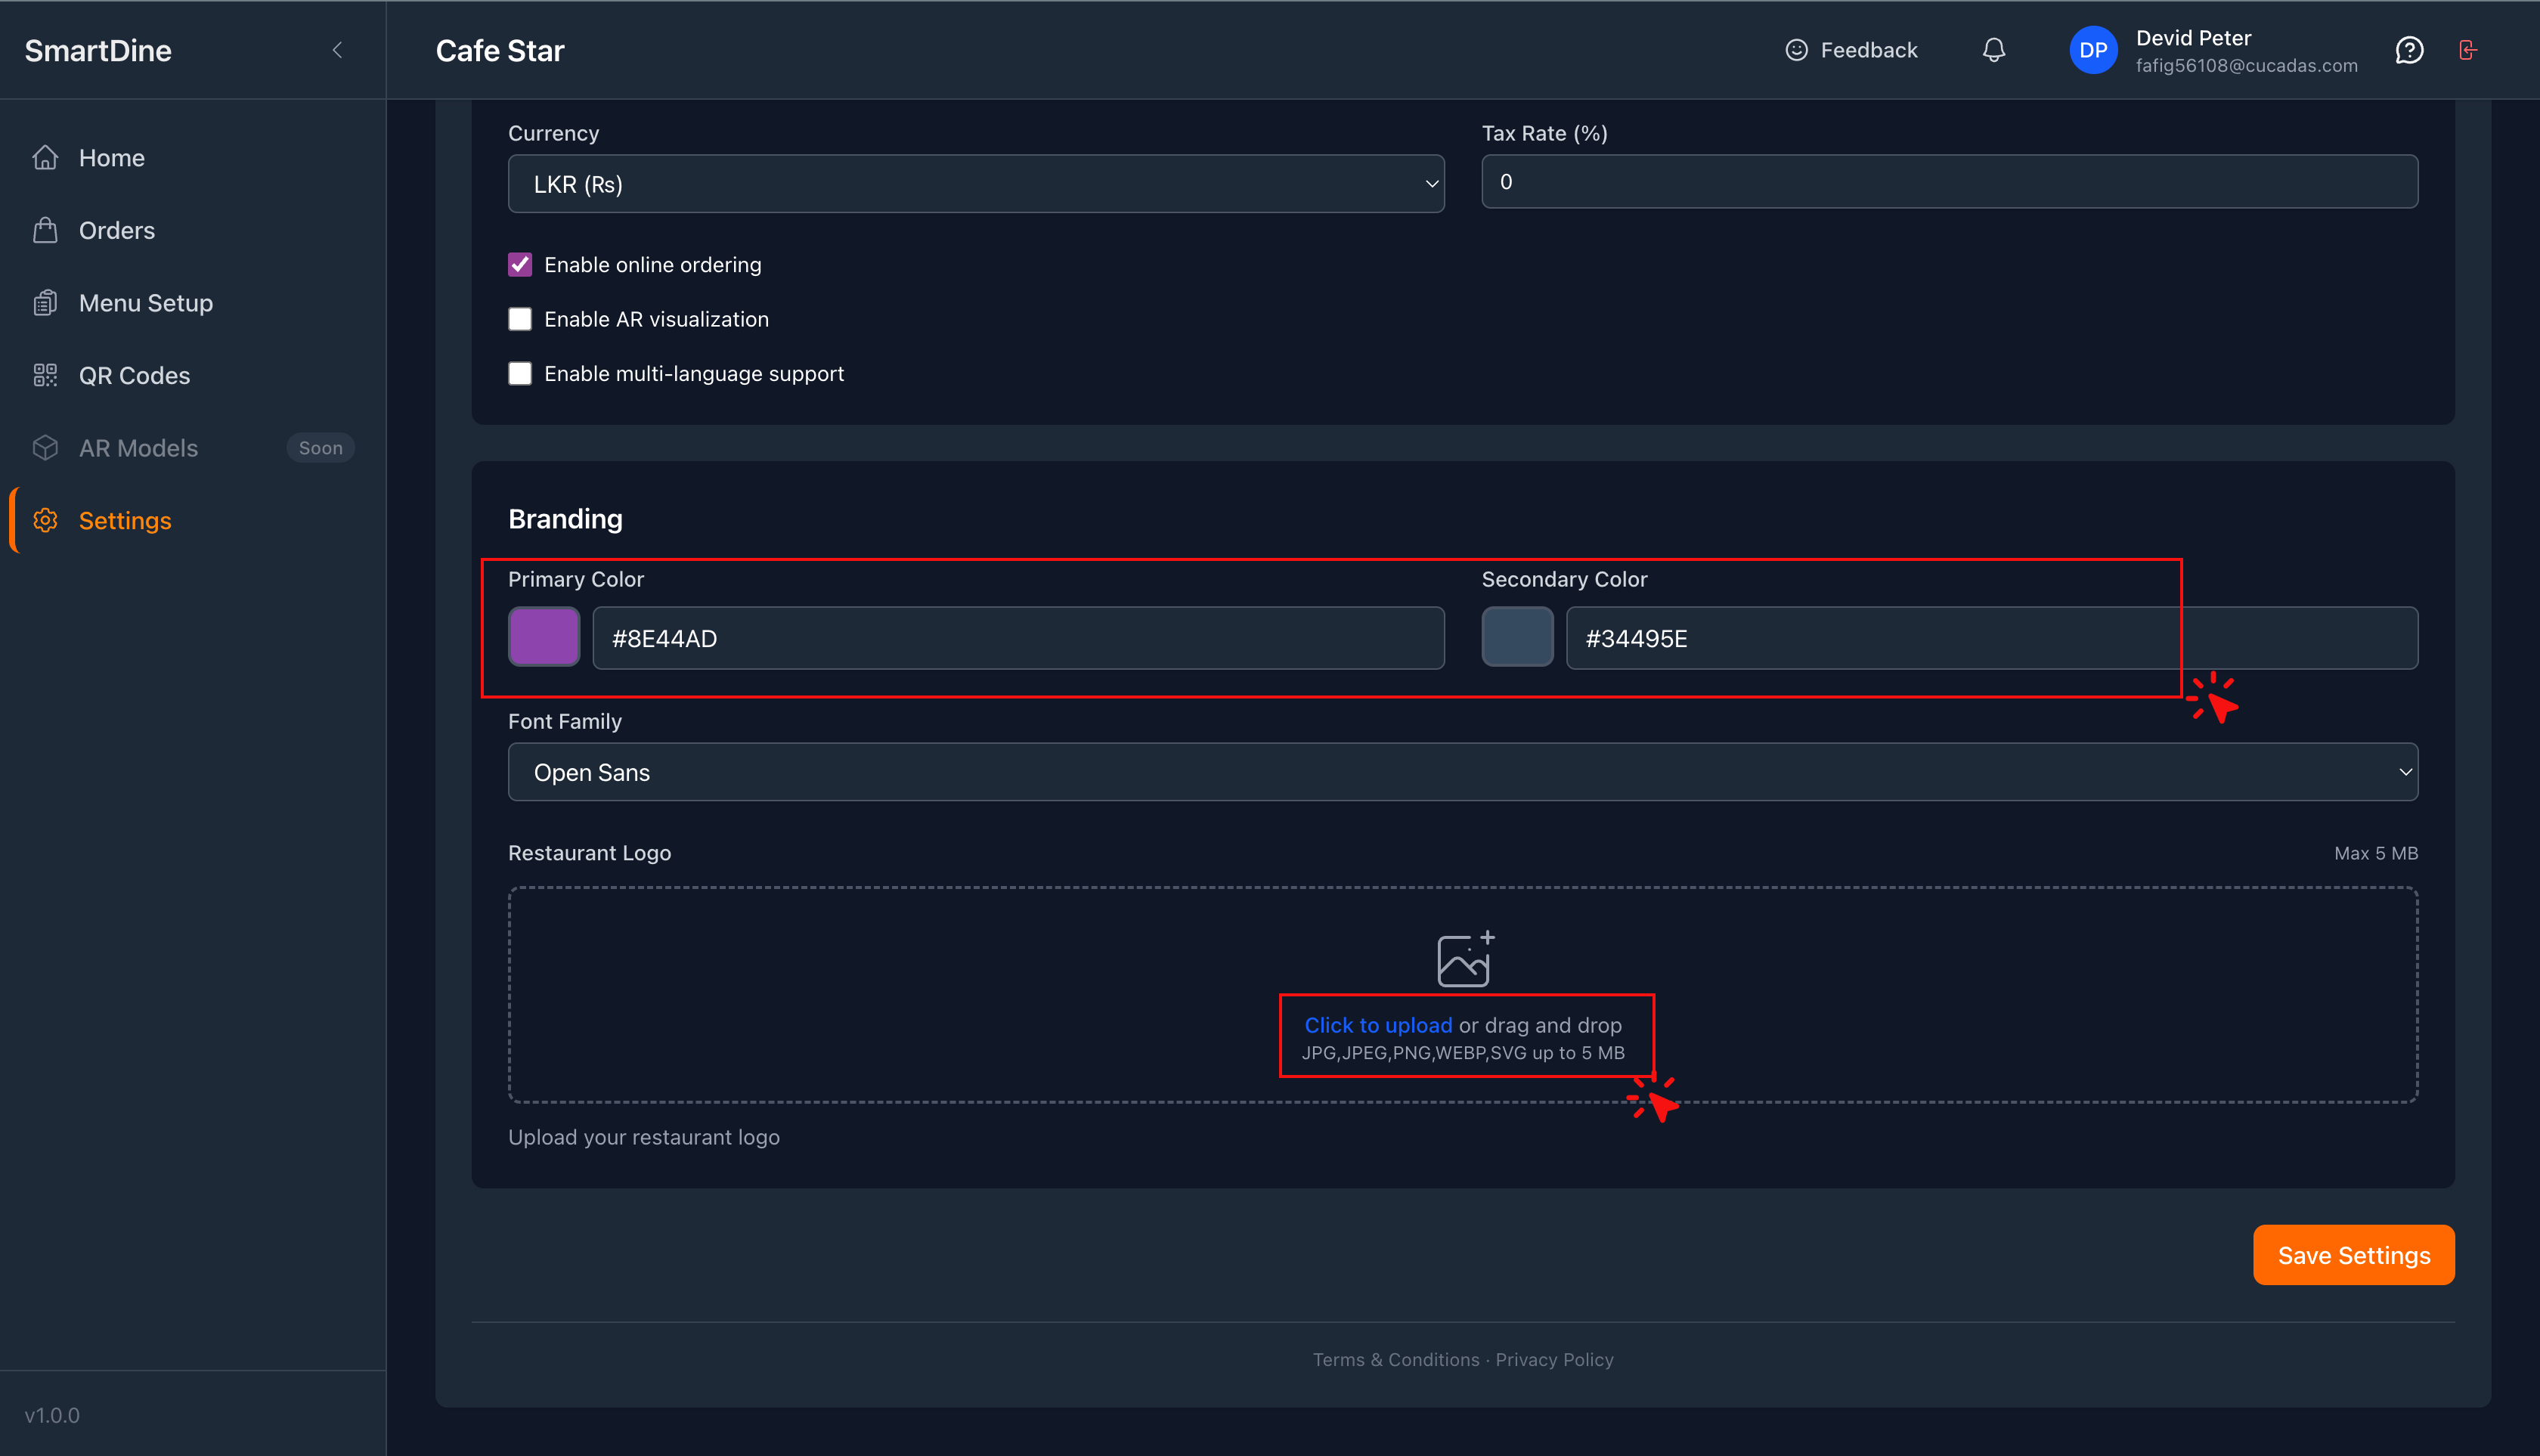
Settings
- Upload your café/restaurant logo.
- Update brand colors to match your identity.
This helps create a more personalized and unique experience for guests.
QR Codes
Based on your subscription, printed QR codes may already be provided.
In this section, you can:
- View all table QR codes
- Download QR codes
- Print and place them on tables later if needed

✅ You're now ready to go live with SmartDine and give your guests a smoother dining experience!
Daily Operations
Your day-to-day workflow
Home (Dashboard)
View business insights such as:
- Sales
- Revenue
- Orders placed through SmartDine
Use analytics to make better business decisions.
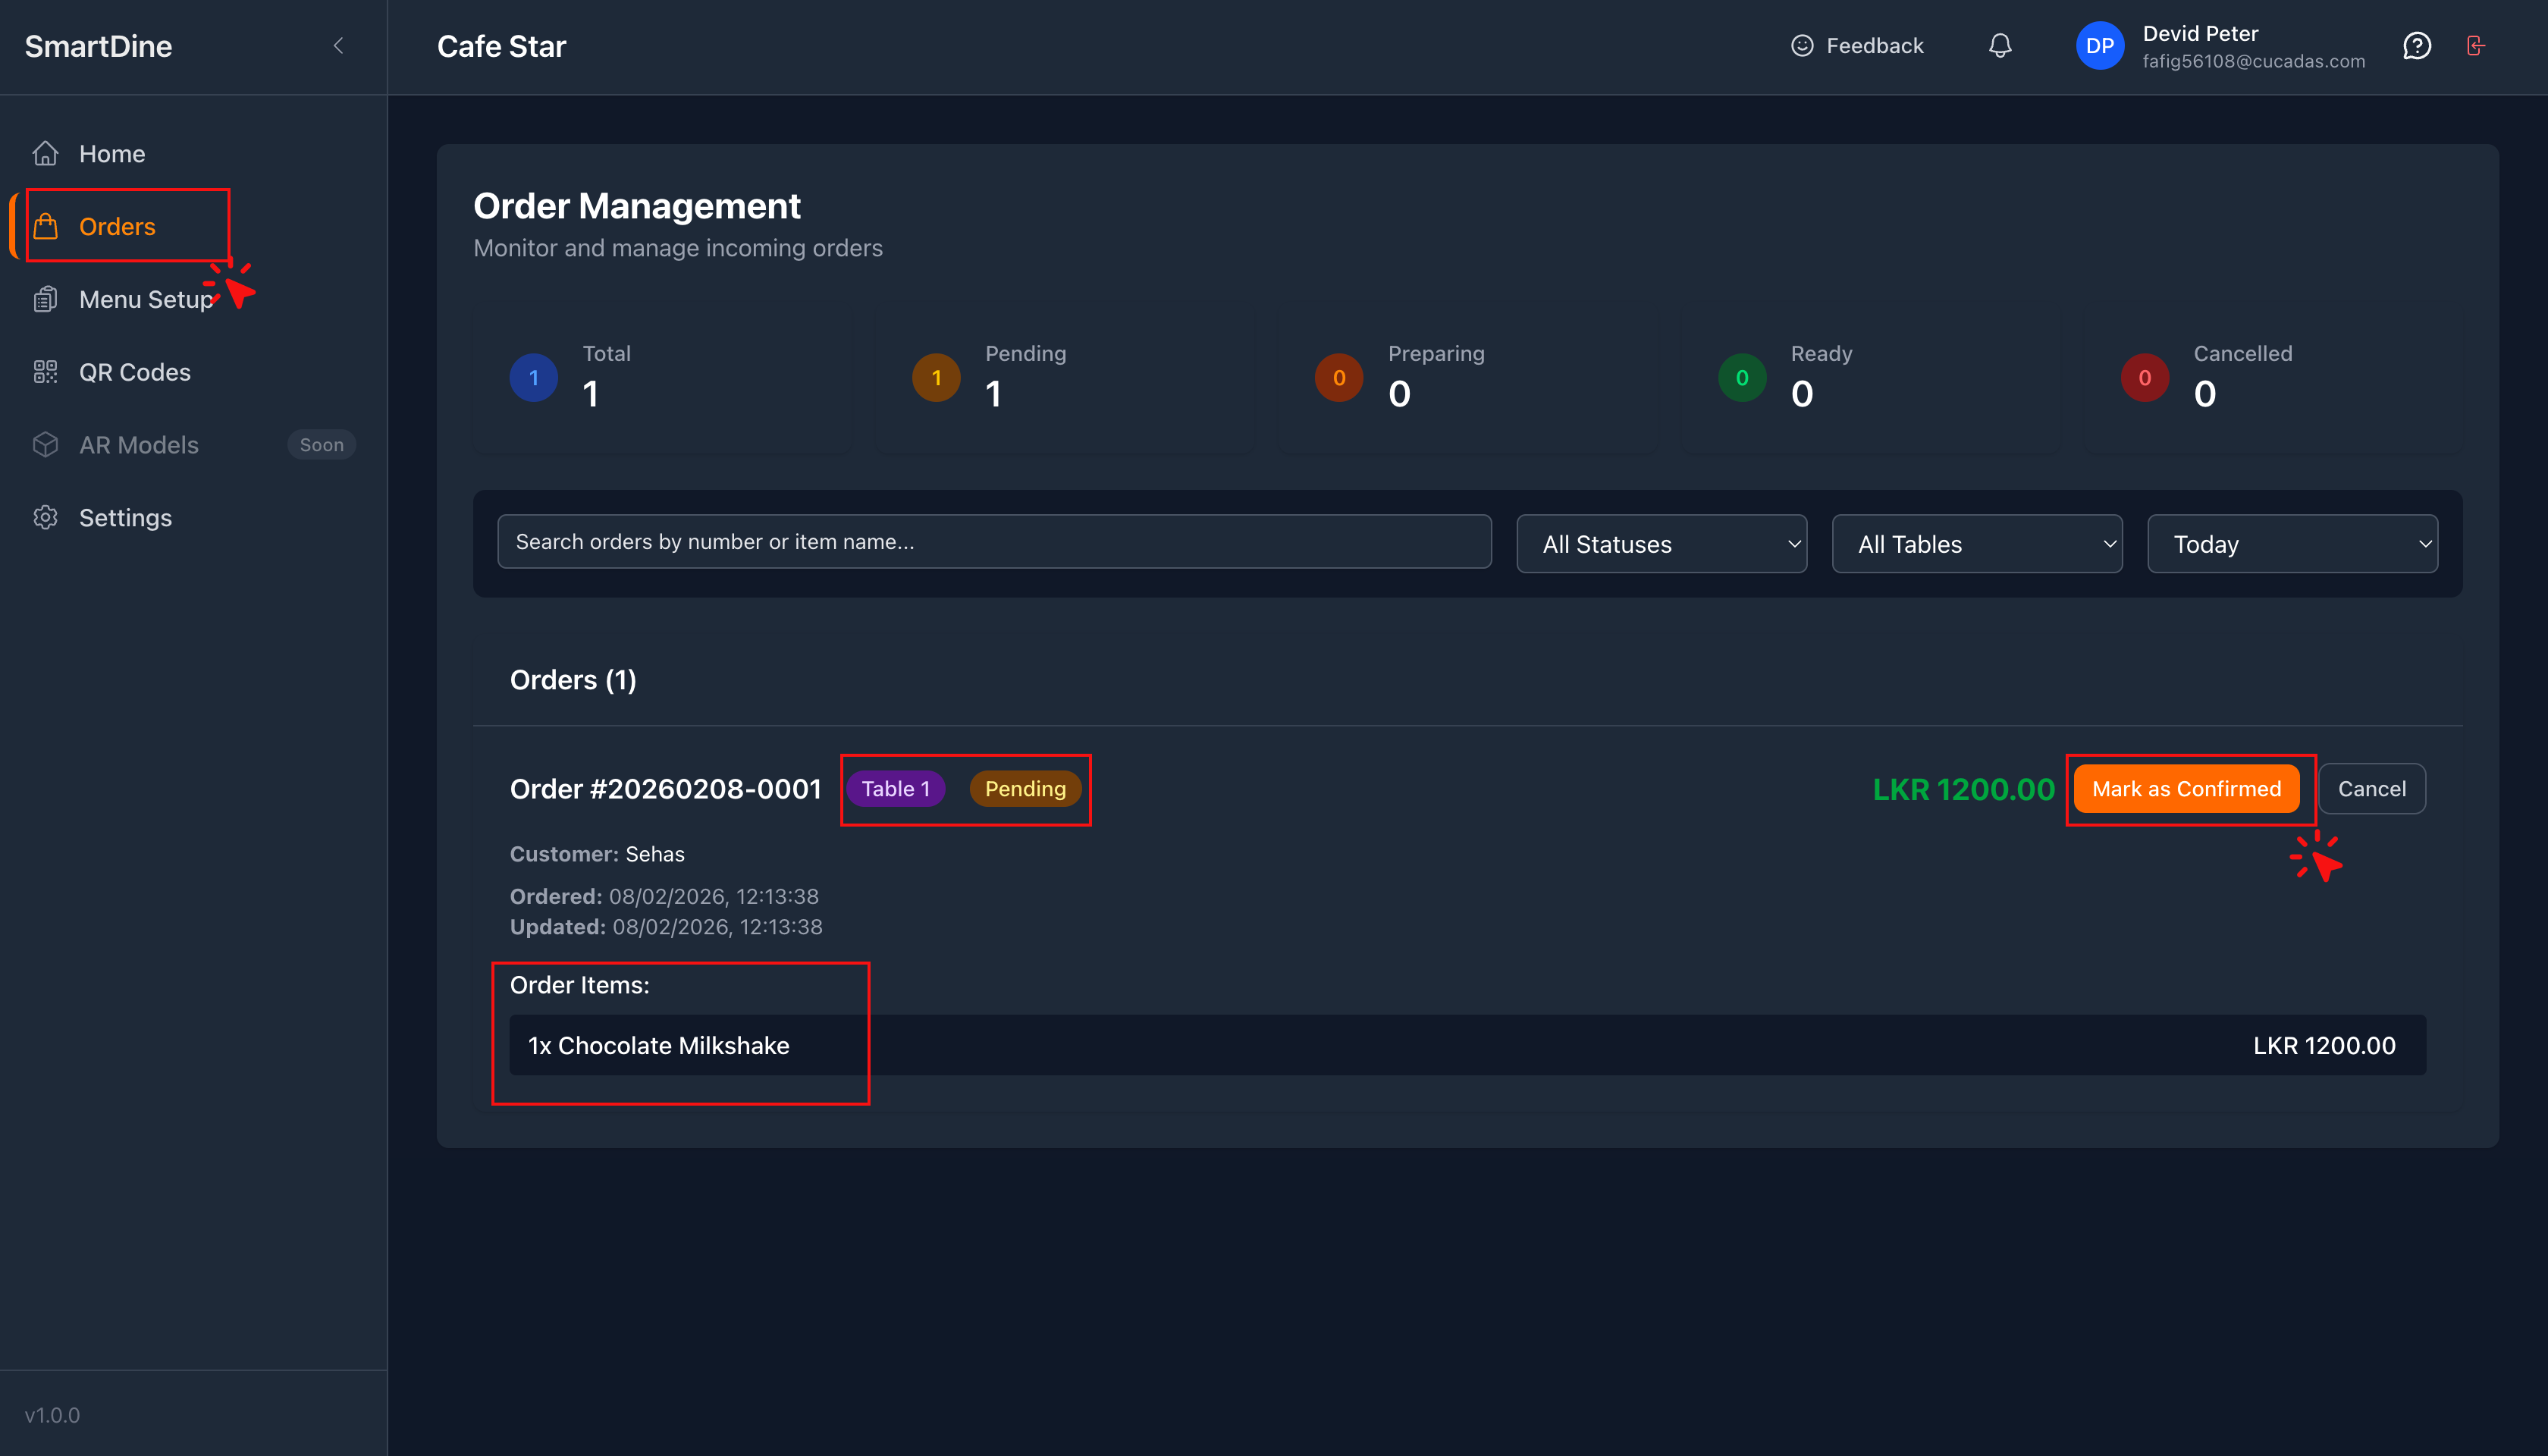
Orders
View all customer orders in real time.
You can see:
- Table number
- Customer name
- Ordered items
Order Status Flow
Tip: Use filters to focus on:
- • Today's orders (recommended for daily work)
- • Yesterday / Weekly / Monthly orders if needed
Important Tip: Always close orders before guests leave.
This ensures:
- • New guests don't see old orders
- • Each table gets a fresh and confusion-free experience
Guest Support (High-Level)
Use this section if a guest asks for help
How Guests Use SmartDine
Guests simply scan the QR code on the table.
They browse the menu and place orders directly from their phone.
No app downloads are required.
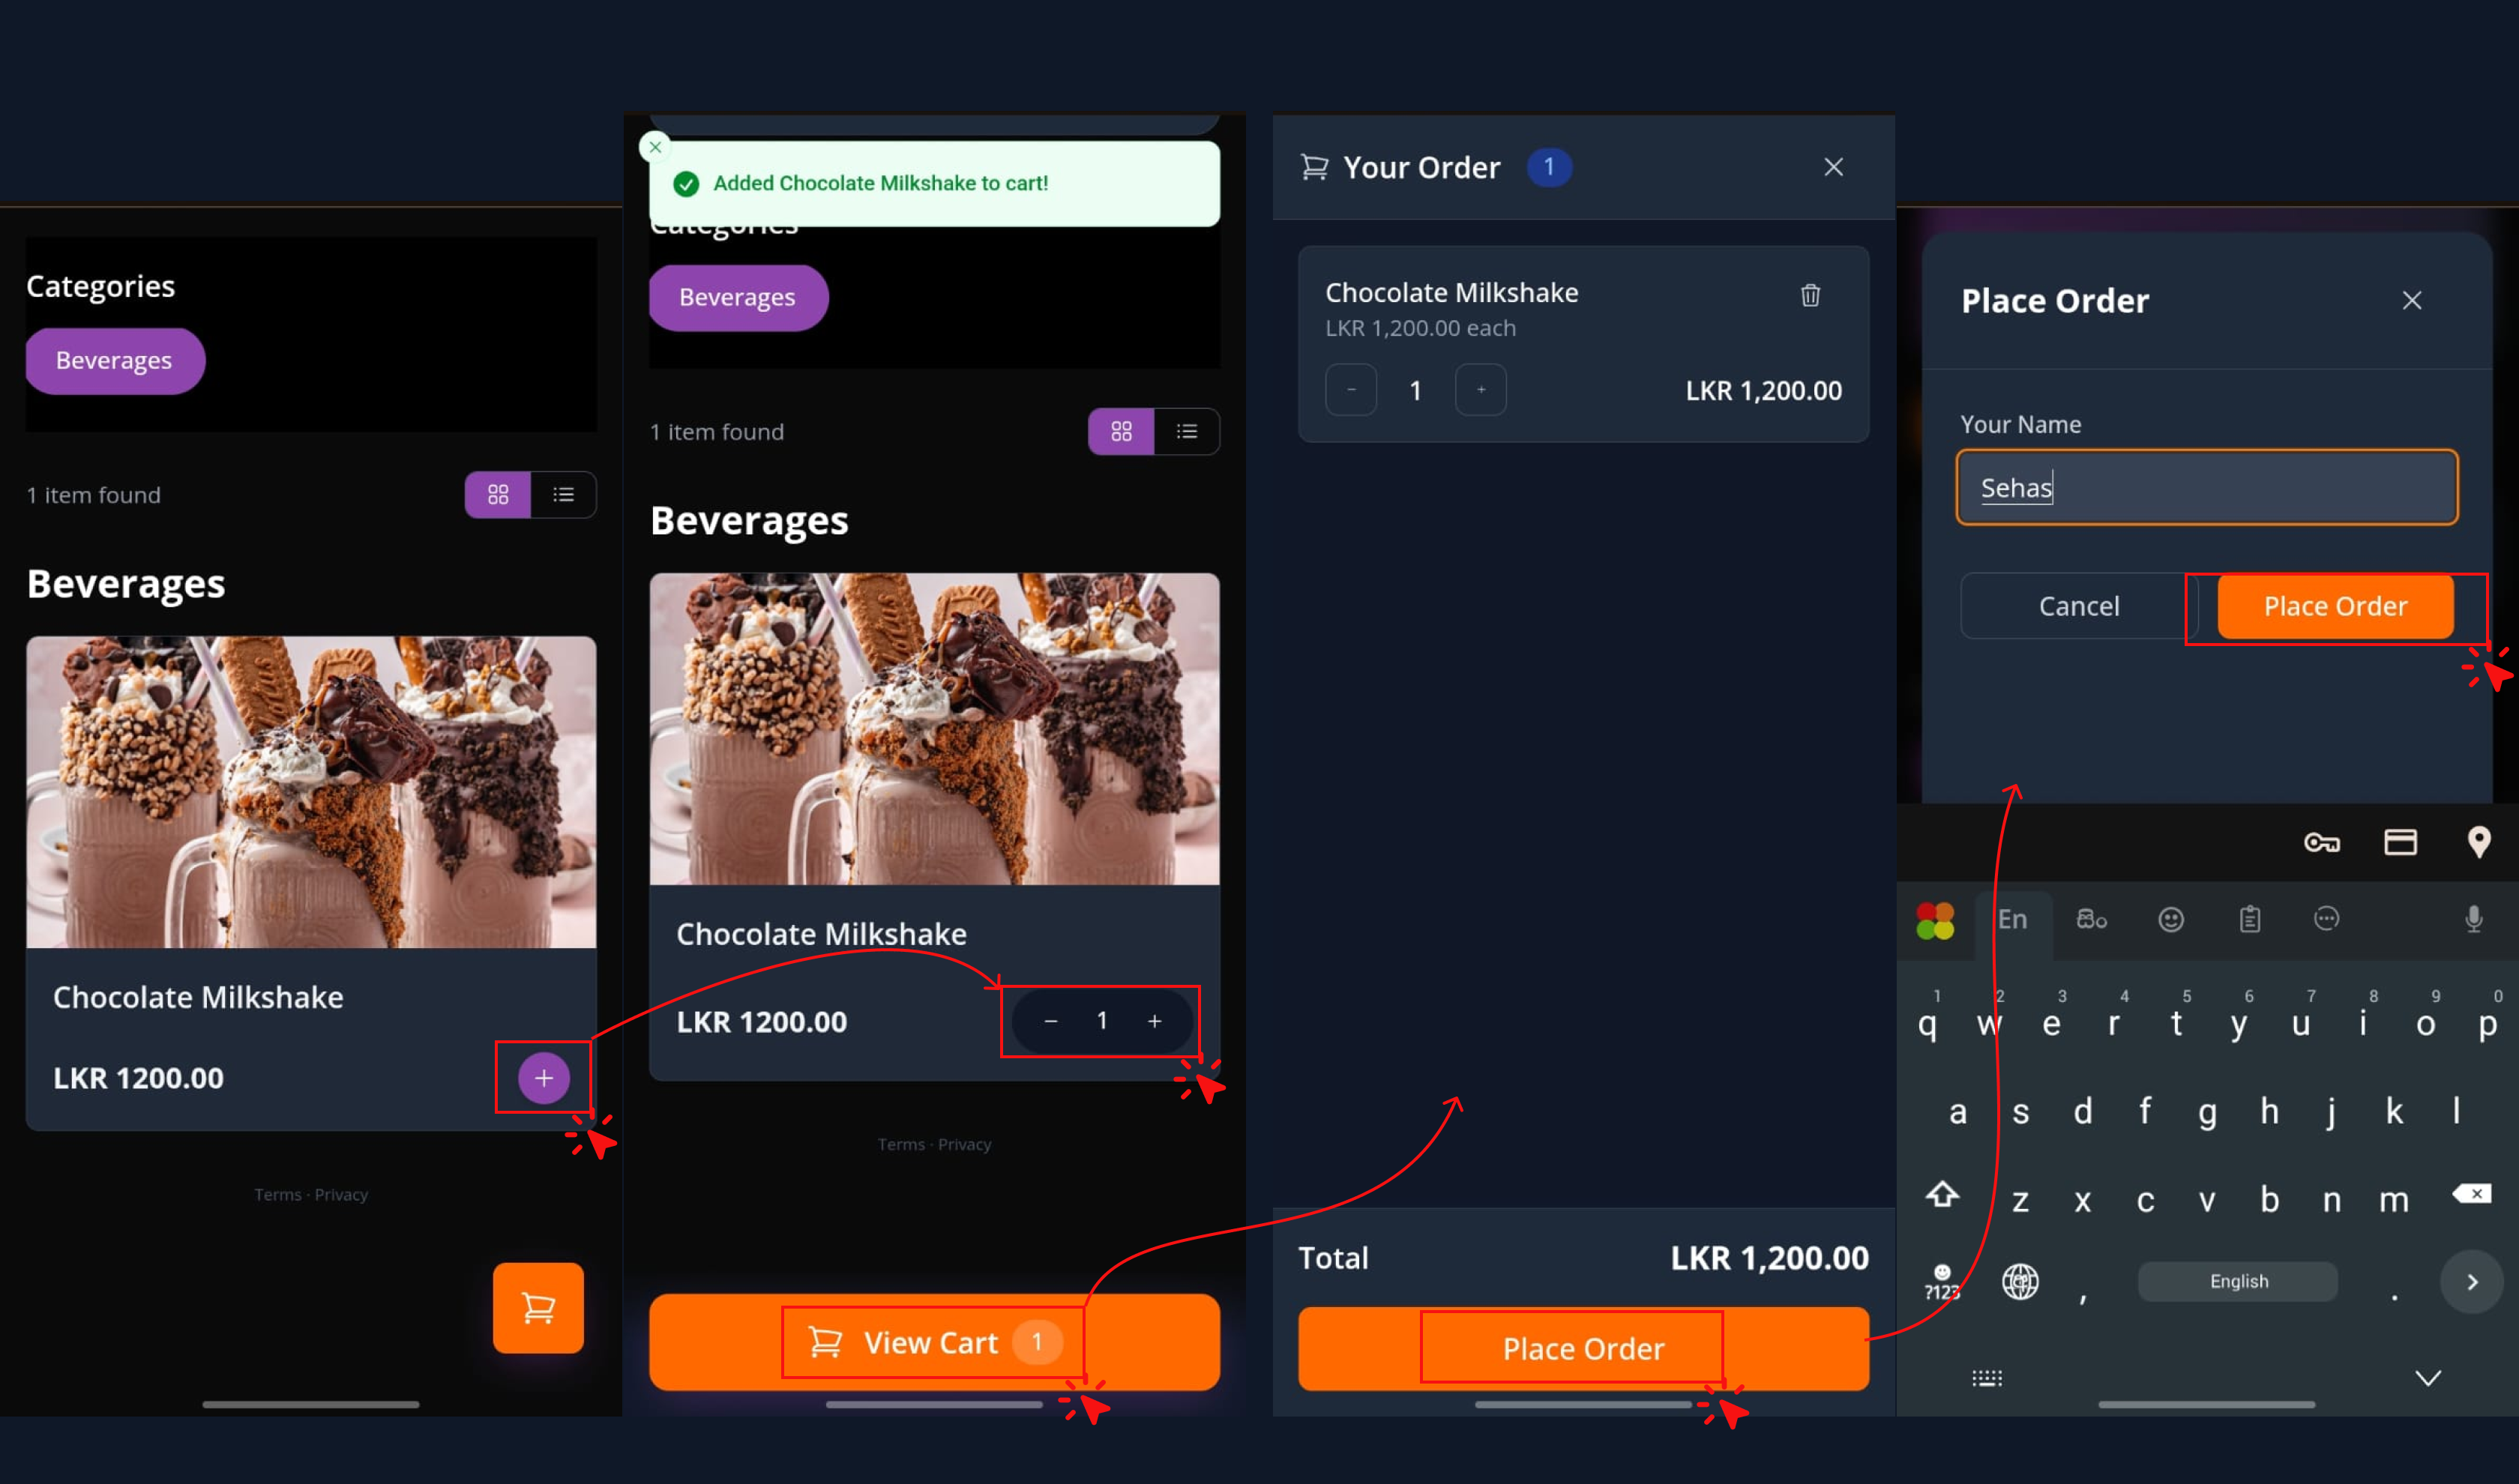
Add Items to Cart
- Tap the "+" icon to add items.
- Click View Cart.
- Enter their name and place the order.
View Items Ordered
- Tap View My Orders
- See the items you ordered
- Track the status of your order in real time
Frequently Asked Questions (FAQs)
Common issues and solutions
Still have questions? We're here to help!
Get help & share feedback
Contact us via WhatsApp
- Send a message explaining the issue.
- Voice messages, screenshots, or screen recordings are highly recommended for faster support.
Rate Us
Share your feedback with us. Your input helps us improve SmartDine and tailor it better for your business.
Smart Dine Admin Training Guide • Last updated February 2026